
How to Virtually Renovate a Room Photo With AI (7 Steps)
Learn how to virtually renovate a room photo with AI in seven steps, using a real flooring-and-paint workflow from upload to final comparison.

In this tutorial11 sections
Dated finishes can make buyers focus on the work a property needs instead of the room's size and potential. This tutorial shows how to virtually renovate a room photo with AI using a real RePhoto workflow, from the original upload to an accepted before-and-after comparison.
Quick answer: upload a clear photo of the dated room, describe the finishes to replace and the permanent features to preserve, generate one focused concept, and compare every wall, opening, fixture, and perspective line before accepting. This real enhancement used one RePhoto credit.
Virtual renovation versus virtual staging
Virtual renovation changes finishes or visible condition to illustrate a possible future state: new flooring, paint, cabinetry, tile, or other design choices. Virtual stagingadds furniture and decor to help explain how an empty room could be used. They solve different problems and should be presented differently.
Use renovation when the listing needs a clearly labeled concept of what an outdated space could become. Use staging when the room is already in representative condition but needs scale, function, and visual warmth. Neither should be presented as the property's current physical state.
Step 1: Choose a clear photo of the dated room
Start with the highest-resolution original available. The example room has stained carpet, marked yellow walls, a ceiling fan, one window, a doorway, outlets, trim, and a floor vent. Those fixed reference points make it possible to judge whether the renovation concept remains faithful to the source.
- Use a level, wide view that shows the floor and wall boundaries.
- Keep doors, windows, fixtures, and architectural details visible.
- Avoid screenshots, portal thumbnails, and heavily compressed files.
- Decide which finishes may change before writing the instruction.
- Retain the unedited source for comparison and disclosure.

Step 2: Upload the original room photo
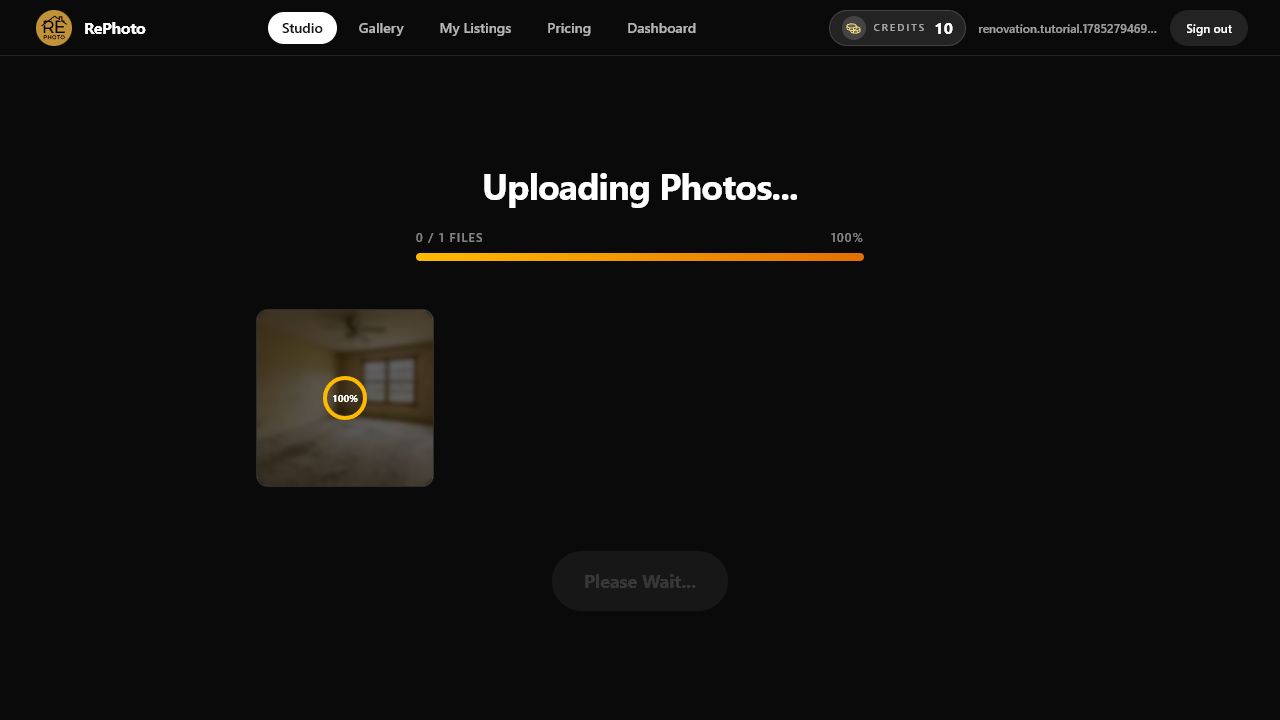
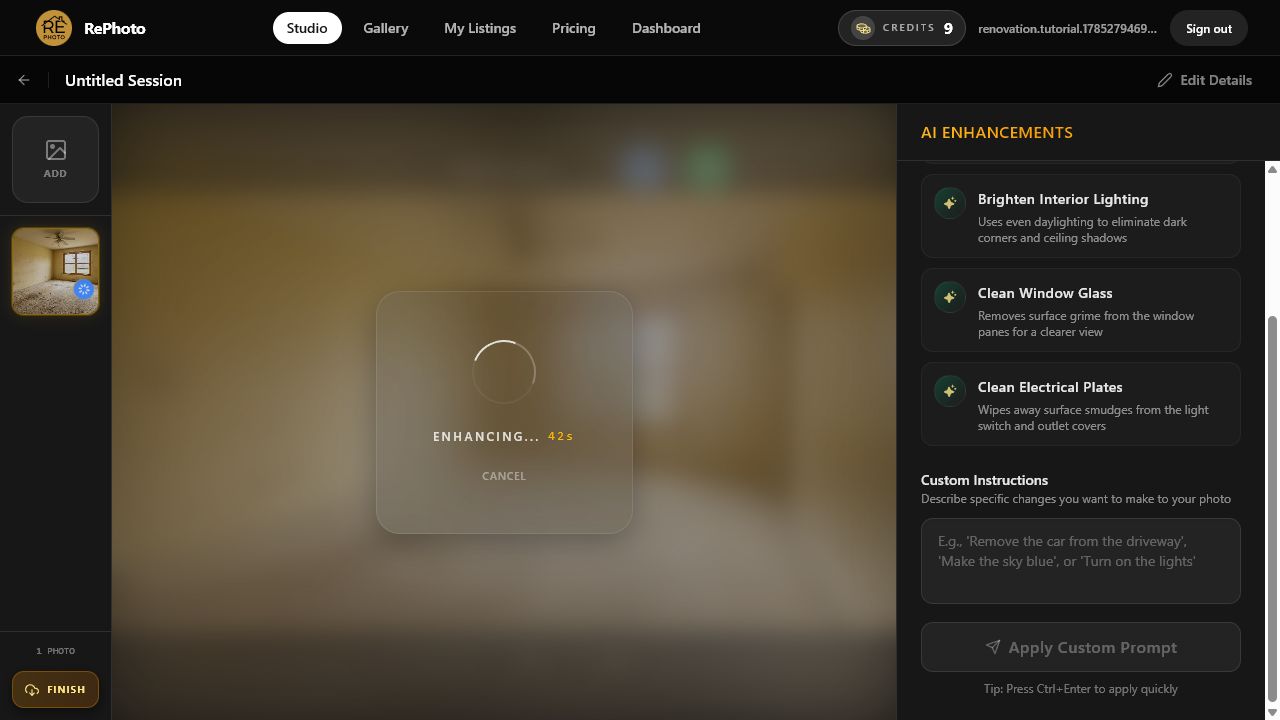
Select the dated-room image and wait for the upload to complete. RePhoto saves the original and opens the editing session before analyzing the scene. Keep the page open until the photo appears in the editor.
Step 3: Review the image-specific AI suggestions
Wait for AI Enhancements to inspect the room. In this run, RePhoto suggested staging the empty bedroom, improving the lighting, cleaning the window glass, and cleaning electrical plates. None of those focused tasks described the full flooring-and-paint concept we wanted.
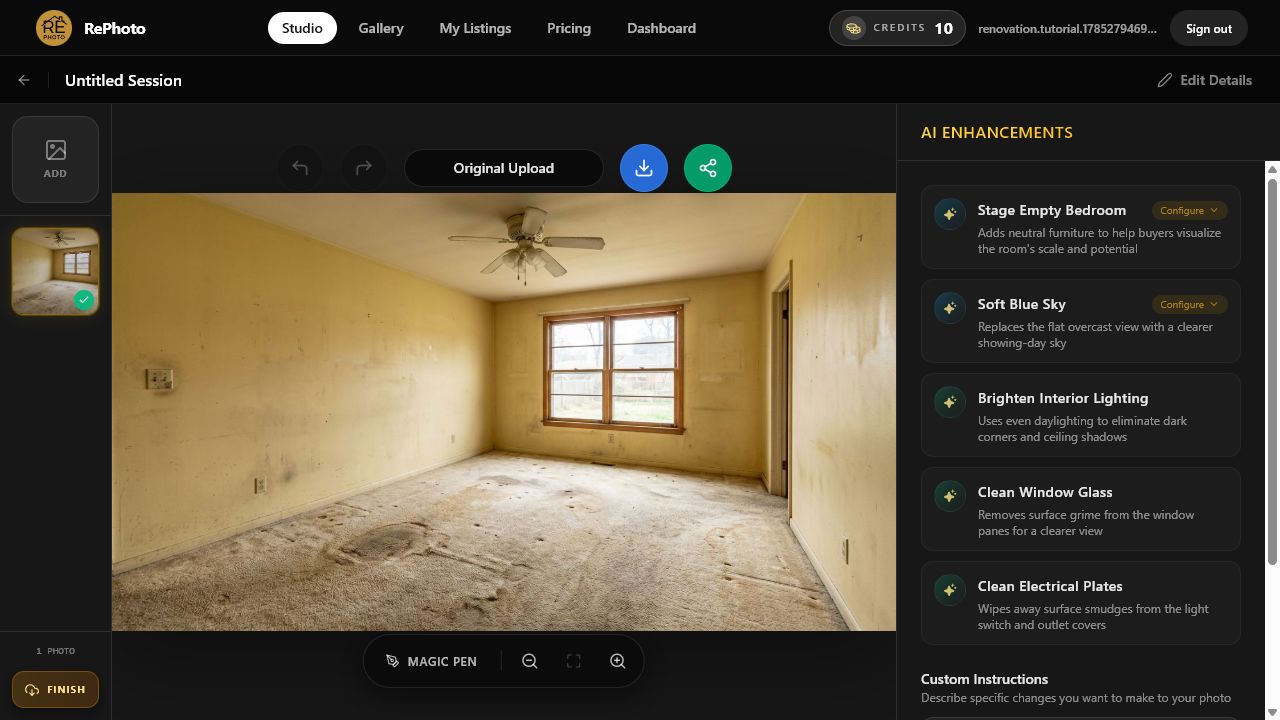
Suggestions are generated from each image, so labels can vary. Choose a focused suggestion when it matches the intended edit. Otherwise, use Custom Instructions rather than selecting a loosely related task.
Step 4: Write a precise virtual renovation prompt
A useful instruction names both sides of the edit: what should change and what must remain untouched. We used the following prompt for this room:
Virtually renovate this dated empty room. Replace the stained carpet with light natural oak flooring, repaint the walls warm white, and keep the windows, doors, outlets, ceiling fan, room dimensions, and camera angle unchanged. Do not add furniture.
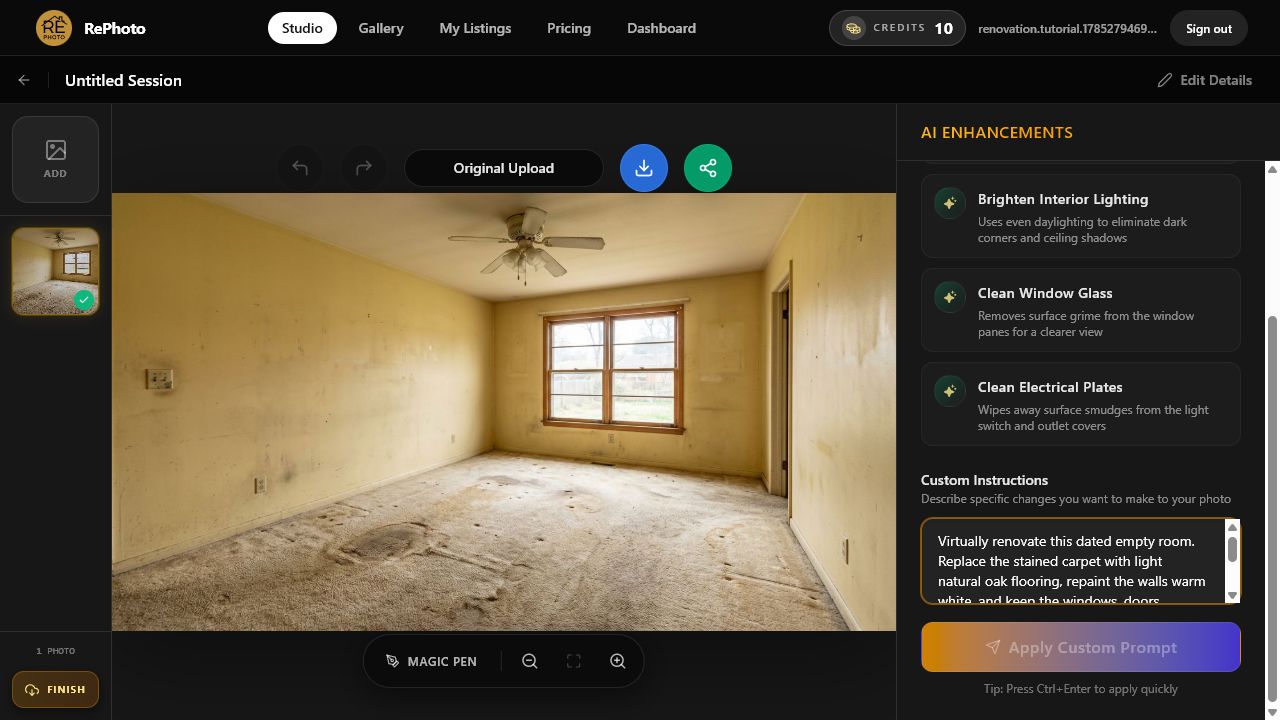
Keep the first request narrow. Changing flooring and paint together is easy to understand and review; changing the layout, windows, furniture, lighting, and finishes in one generation makes errors harder to isolate.
Step 5: Generate the renovation concept
Select Apply Custom Prompt and keep the editor open while RePhoto creates the concept. The development account moved from 10 credits to 9 after this successful enhancement. Processing time varies, so wait for Review Generation instead of resubmitting the same instruction.
Step 6: Review finishes, geometry, and permanent features
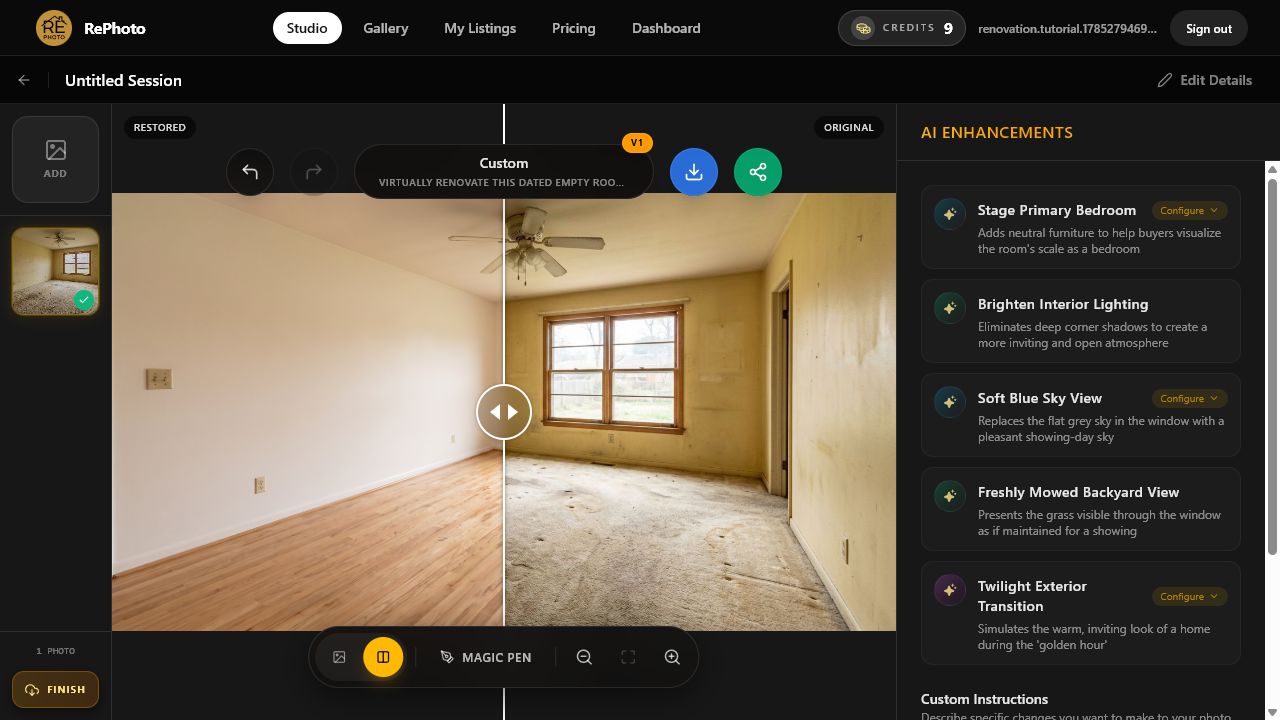
The generated image opens in Review Generation. In this result, the stained carpet became light wood flooring and the marked yellow walls became a warm white. The room stayed empty, and the window, doorway, electrical plates, and general composition remained visible.
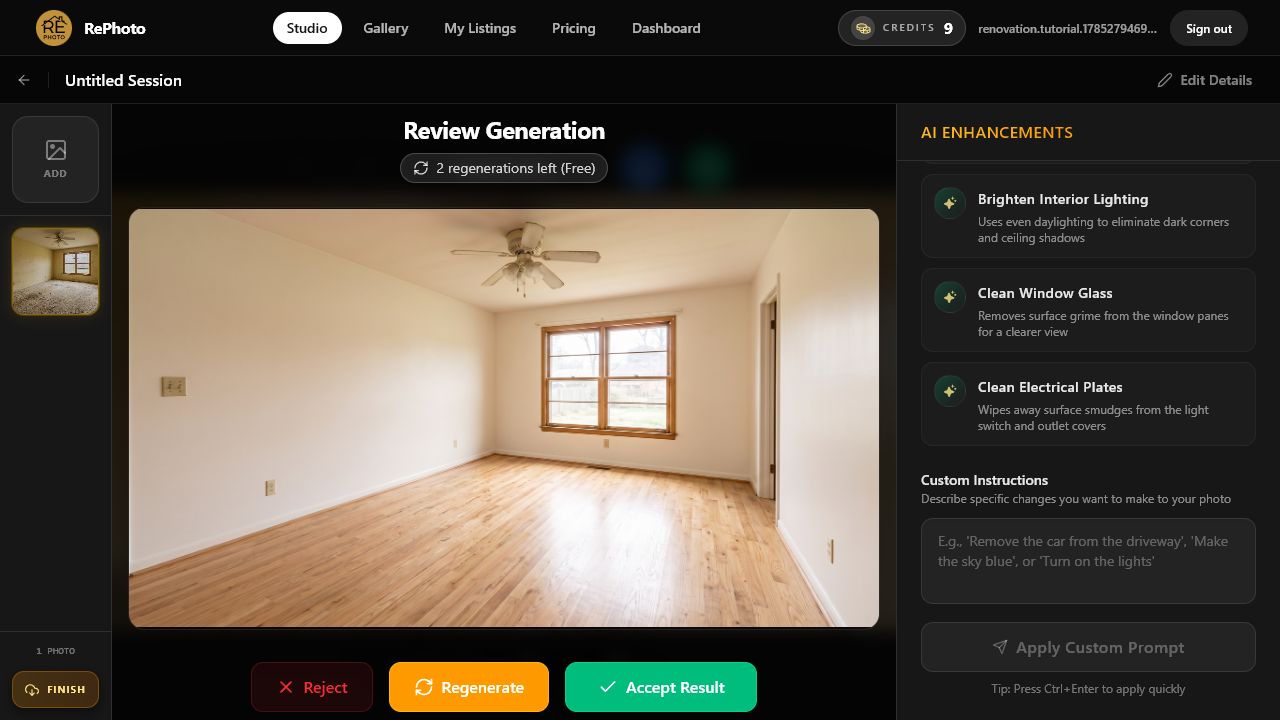
- Wall corners, ceiling lines, and floor perspective remain straight.
- The window, doorway, outlets, switches, trim, and vent remain present.
- Floorboard scale and direction agree with the room perspective.
- New materials meet walls and openings without warped edges.
- Lighting and shadows remain plausible for the existing window.
- No furniture or structural feature was invented.
Choose Regenerate if the model moves an opening, removes a fixture, bends the floor, changes the room dimensions, or invents an architectural feature. A persuasive concept still needs to describe the same underlying space.
Step 7: Accept, compare, and download
Select Accept Result when the concept passes inspection. Drag the comparison slider across the image to compare the restored and original versions. Check the full frame once more, then download the accepted concept. The final balance remains at 9 credits.
Virtual renovation quality checklist
- Define a small, plausible set of finish changes.
- State which architectural and permanent elements must stay unchanged.
- Review corners, openings, floor perspective, trim, and fixtures.
- Reject concepts that alter room dimensions or hide property defects.
- Keep the source and concept together for transparent comparison.
- Label the image as a renovation concept wherever it is displayed.
Disclosure and accuracy for virtual renovation images
A renovation visualization depicts a possible future condition, not the property as photographed. Verify the MLS rules and laws that apply to the listing. Current CRMLS guidance on digitally altered images requires specific handling for images that add, remove, or change scene elements, including disclosure and access to the original in the cases covered by its rules.
Present a virtual renovation as a clearly labeled design concept. Never use it to imply that unfinished work has already been completed or to conceal the property's current condition.
Frequently asked questions
What is virtual renovation for real estate?
Virtual renovation digitally changes finishes or design elements in a property photo to illustrate a possible future state. Common examples include new flooring, paint, cabinets, tile, fixtures, or facade materials.
Can AI virtually renovate a room from one photo?
Yes. AI can generate a renovation concept from a single clear photo and a precise instruction. It is a visualization, not a construction plan, specification, estimate, or guarantee that the work is feasible.
How is virtual renovation different from virtual staging?
Renovation changes finishes or visible condition. Staging adds furniture and decor. A dated but furnished room may need renovation; an accurate, finished, empty room may only need virtual staging.
Should a virtual renovation change the room layout?
Not unless the image is explicitly presented as a structural design concept and reviewed accordingly. For listing marketing, preserving the existing walls, openings, dimensions, and camera perspective usually makes the concept easier to understand and less likely to mislead.
Do virtual renovation photos need disclosure?
Rules vary by MLS and jurisdiction. Keep the original, label the concept clearly, and verify the current requirements before adding it to a listing or advertisement.
Create one virtual renovation concept in RePhoto
Open RePhoto Studio and test one dated room with a focused finish change, or learn more about the AI virtual renovation tool for real estate. If the room only needs furniture and decor, follow our step-by-step virtual staging tutorial.