
How to Virtually Stage an Empty Room With AI (7 Steps)
Learn how to virtually stage an empty room with AI in seven steps. Follow a real living-room workflow from upload and furniture style to final listing review.

In this tutorial10 sections
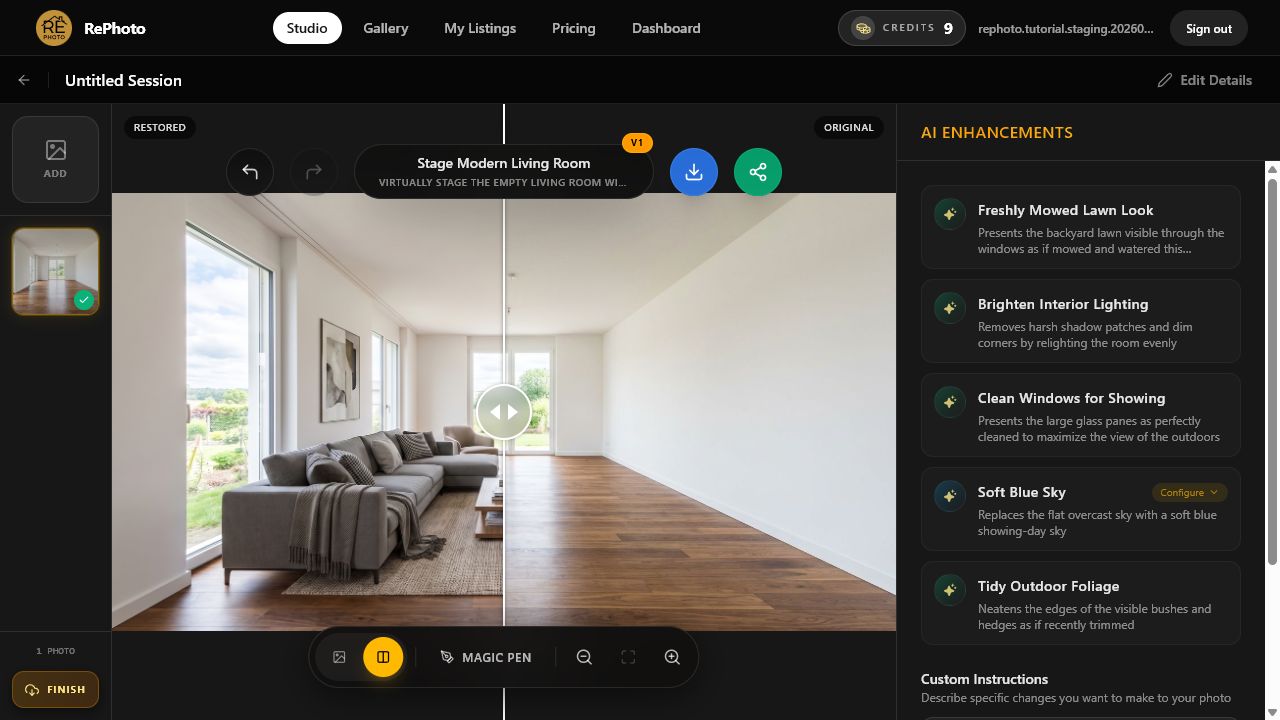
Virtual staging adds furniture and decor to a photo of a vacant room without moving a sofa, hiring a stager, or waiting for a designer. This tutorial documents a real RePhoto run on an empty living room—from the original upload to the accepted comparison—so you can see every choice and quality check that matters.
Quick answer: upload a clear empty-room photo, choose Stage Modern Living Room, set the room to Living Room, choose a furniture style, generate, and check that the result preserves the real architecture. One accepted enhancement uses one RePhoto credit.
Why start with the living room?
The living room is usually the safest first image to stage because it helps buyers understand both scale and lifestyle. In the National Association of REALTORS® 2025 staging report, buyers' agents ranked the living room as the most important room to stage. The same report found that 83% said staging made it easier for buyers to visualize a property as their future home. See the NAR report summary.
That does not mean every empty room needs furniture. Stage the few spaces where layout or purpose is hard to read, then keep the original photos available so buyers can see the property's actual condition.
Step 1: Choose a clean empty-room photo
Open RePhoto Studio and start with the highest-resolution original you have. A useful source photo should show enough floor area for believable furniture placement while keeping the walls, windows, doors, outlets, and built-ins visible.
- Keep the camera level so vertical walls do not lean.
- Use a wide view, but avoid extreme wide-angle distortion.
- Turn on the room's existing lights and expose the windows cleanly.
- Remove people, pets, moving boxes, and temporary equipment.
- Do not crop away the room's entrances or major architectural clues.

Step 2: Upload the empty living room
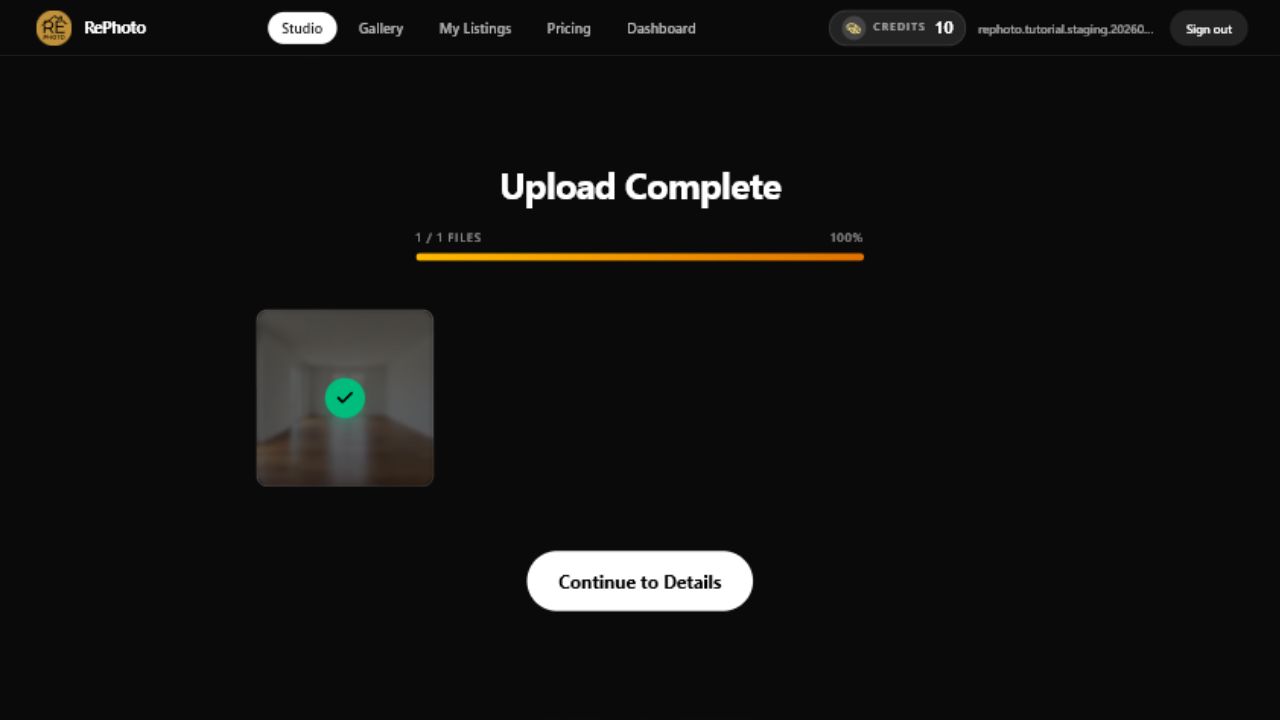
Select the photo and wait until the upload reaches 100%. RePhoto then analyzes the room and builds image-specific suggestions. Do not leave the page while the file is still uploading or being analyzed.
Step 3: Choose Stage Modern Living Room
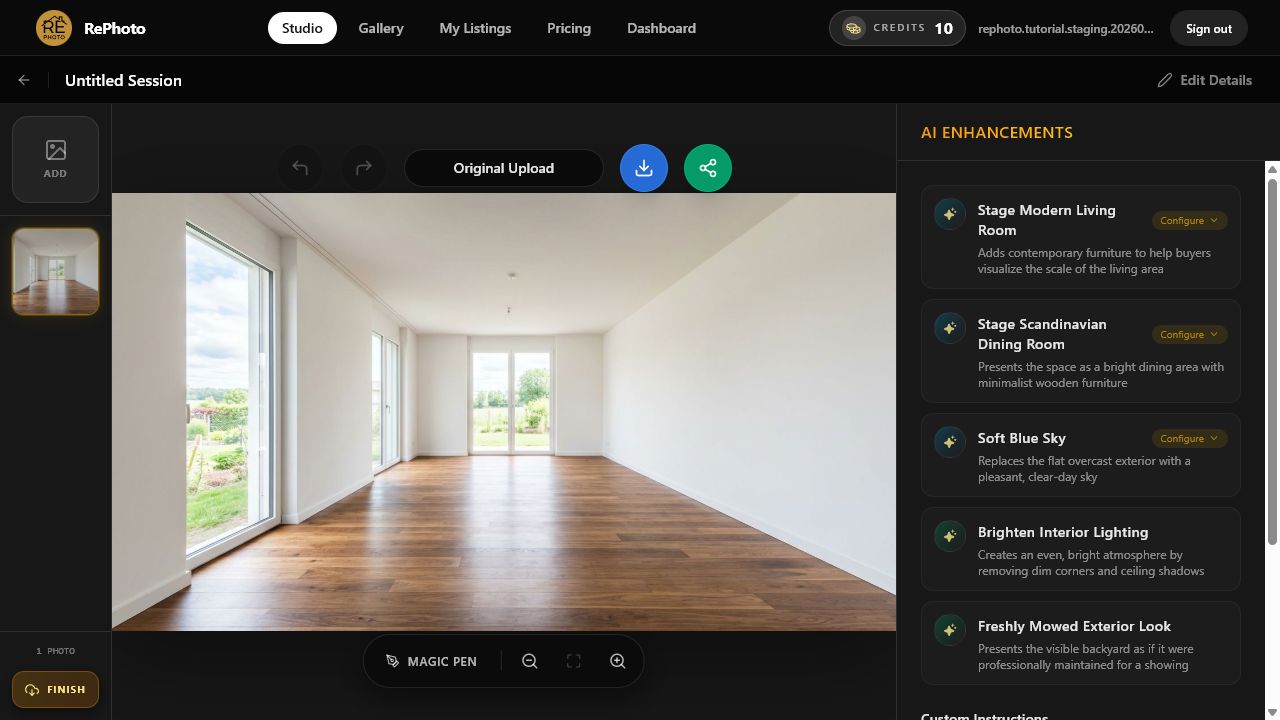
Wait for the AI Enhancements panel to finish analyzing the photo. In this run, RePhoto generated the suggestion Stage Modern Living Room. Select it when it appears. Suggestions are based on the uploaded image, so their order and wording can vary between rooms.
Step 4: Set Living Room and choose Modern
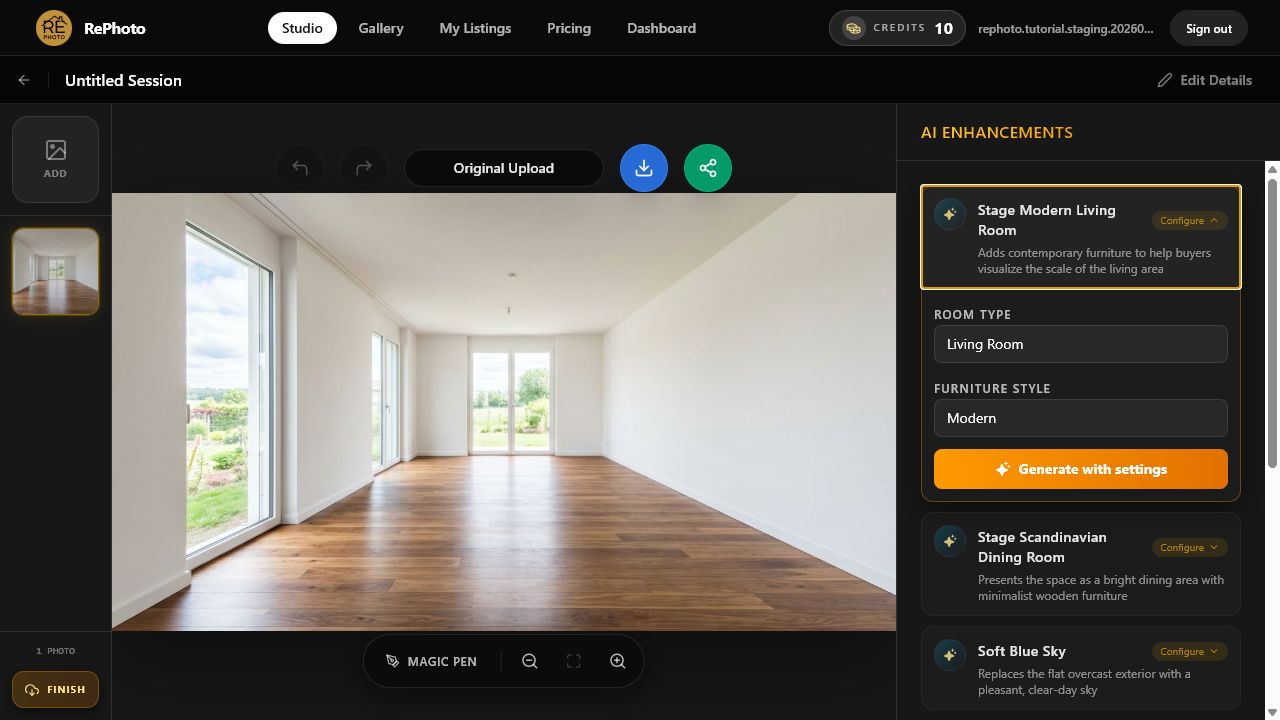
Set Room Type to Living Room. For this example, choose Modern under Furniture Style, then select Generate with settings. Modern works well for a broad listing audience because its clean shapes make furniture scale and circulation easy to judge.
A good style match
Complements the home's price point, finishes, architecture, and likely buyer without making the room look overcrowded.
A risky style match
Uses oversized furniture, blocks doors or windows, or implies space and features that the real room does not have.
Step 5: Generate the virtually staged room
Keep the editor open while RePhoto produces the new version. The model uses the empty room's perspective and lighting to place furniture and create matching shadows. Processing time can vary with image size and model demand.
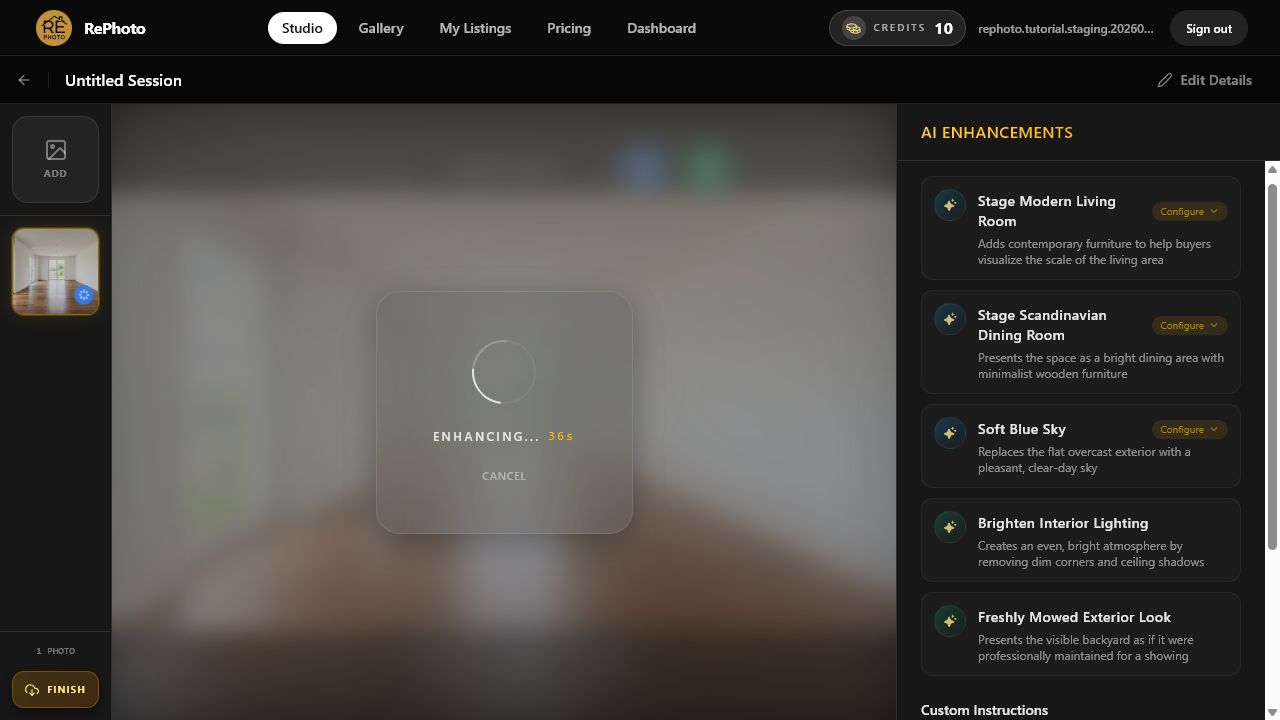
Step 6: Review scale, geometry, and shadows
The generated image opens in Review Generation. Do not accept it only because the furniture looks attractive. Compare it with the original and verify that the result still represents the real room.
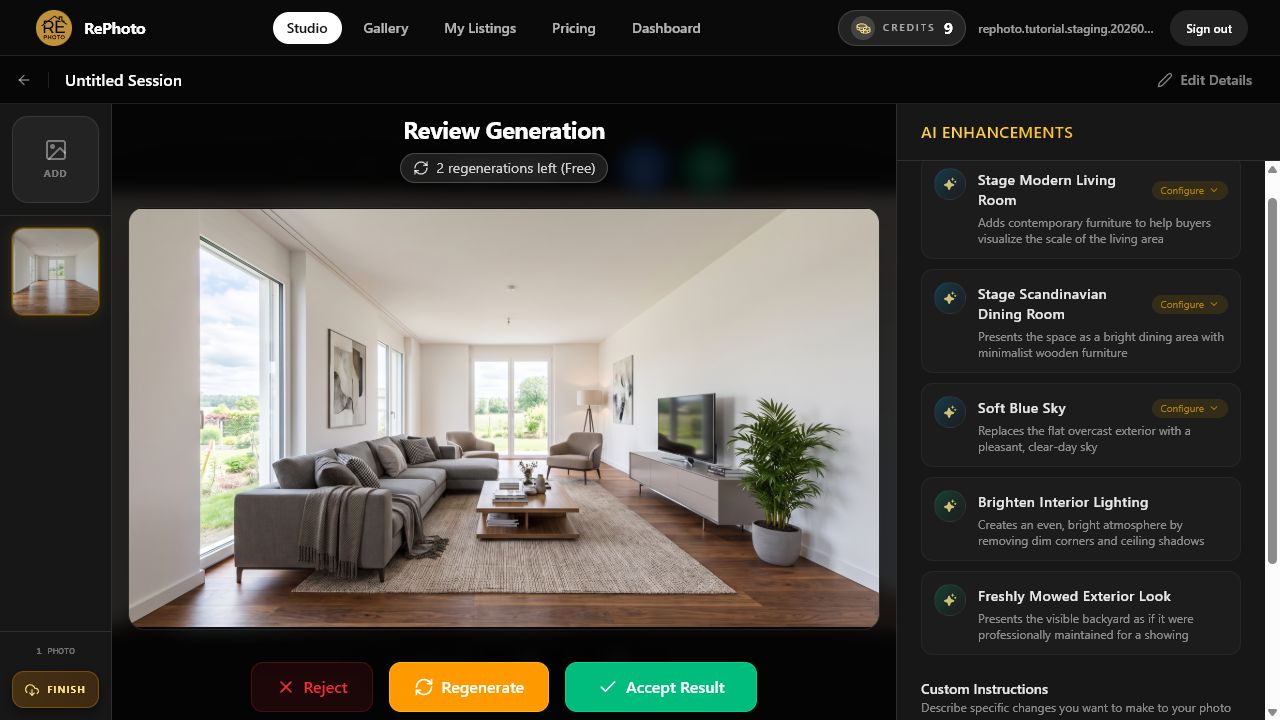
- Walls, ceilings, floors, doors, windows, and built-ins are unchanged.
- Furniture is the right scale for the floor area and ceiling height.
- Door swings, walkways, vents, outlets, and access points stay clear.
- Perspective lines and contact shadows agree with the original camera angle.
- Reflections and window views do not introduce nonexistent features.
- Repeated objects, warped legs, floating decor, and blended edges are absent.
If the layout looks implausible, use Regenerate instead of accepting a misleading image. The review screen shows how many regenerations remain.
Step 7: Accept, compare, and download
Choose Accept Result when the staged version passes the quality check. Drag the comparison slider across the image one last time, then download the finished photo. Keep the original file as well; it is useful for disclosure and lets buyers see the true vacant condition.
How to disclose virtual staging responsibly
MLS rules and state requirements vary, so check the policy that applies to the listing. A strong baseline is to label the altered image as virtually staged, retain the original, and avoid changing or hiding permanent property features. NorthstarMLS's 2026 guidance, for example, recommends clear disclosure and an unaltered before image for each staged room. Read the virtual staging and AI-image guidelines.
Virtual staging should help buyers imagine furniture in the room—not conceal defects, enlarge the space, add permanent fixtures, or redesign the property.
Frequently asked questions
Can I virtually stage a room that already has furniture?
This workflow is designed for a genuinely empty room. If furniture or clutter is present, remove those items first with the appropriate enhancement, review the empty result, and only then apply virtual staging.
Which room should I stage first?
Start with the living room when its layout is difficult to understand empty. A primary bedroom or dining room can come next if staging would clarify scale or purpose. You do not need to stage utility spaces or every secondary room.
Which virtual staging style is best for real estate?
There is no universal winner. Modern and Contemporary are broadly useful, while Farmhouse, Traditional, Minimalist, or Industrial can work when they match the property. Accuracy and furniture scale matter more than a fashionable style label.
Should I include the original empty-room photo?
Yes when your MLS or local rules require it, and it is a strong transparency practice even when they do not. Place the original close to the staged version and label the edited image clearly.
Does virtual staging change the property?
It should add only movable furniture and decor. Reject any generation that changes room dimensions, windows, doors, flooring, built-ins, fixtures, views, or visible defects.
Try the workflow on one empty room
Open RePhoto Studio and test your strongest vacant living-room photo, or learn more about the AI virtual staging software before you begin. For budgeting and listing strategy, compare virtual staging versus physical staging and review our virtual staging ROI breakdown.