
How to Brighten a Dark Real Estate Photo With AI (6 Steps)
Learn how to brighten a dark real estate photo with AI in six steps while preserving window detail, natural color, furniture, and architecture.

In this tutorial10 sections
Dark interiors can hide finishes, make rooms feel smaller, and force viewers to choose between visible furniture and visible window views. This tutorial shows how to brighten a dark real estate photo with AI using a complete RePhoto run, from the original upload to an accepted before-and-after comparison.
Quick answer: upload the highest-quality original, wait for image-specific suggestions, choose Brighten Interior Lighting, generate one correction, and check shadows, windows, color, and architecture before accepting. This real enhancement used one RePhoto credit.
AI brightening versus true HDR photography
This workflow starts with one existing photo. RePhoto analyzes that single exposure and produces an HDR-style lighting correction by lifting dark areas and balancing the scene. It is useful when the property has already been photographed and exposure bracketing is no longer possible.
True photographic HDR normally begins at the camera with several bracketed exposures that are merged later. That process can retain more original highlight and shadow data, especially in rooms with very bright windows. The HDRsoft interior photography guide explains the multi-exposure method. If you can reshoot an extreme scene, brackets remain the best source material; if you only have one dark frame, AI enhancement is the practical recovery workflow.
Step 1: Choose the best dark interior source
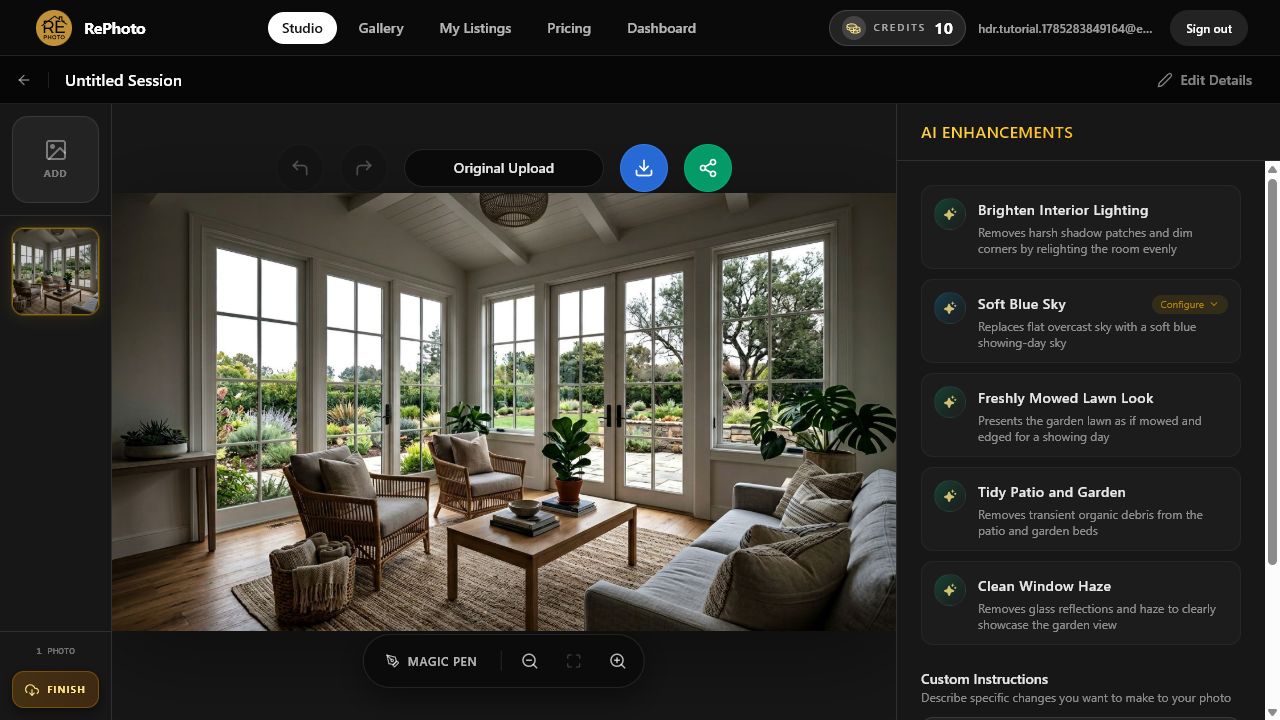
Start with the highest-resolution original available. The example is a furnished sunroom with deep shadows across the ceiling, floor, chairs, and sofa, while the garden remains visible through many windows. That combination makes it possible to judge whether the correction reveals the room without destroying the exterior view.
- Use the camera original, not a portal thumbnail or screenshot.
- Choose a level frame with straight walls and window lines.
- Prefer a file that still contains some detail in dark surfaces.
- Avoid stacking filters before the lighting correction.
- Keep an untouched copy for comparison and listing records.
Step 2: Upload the original photo
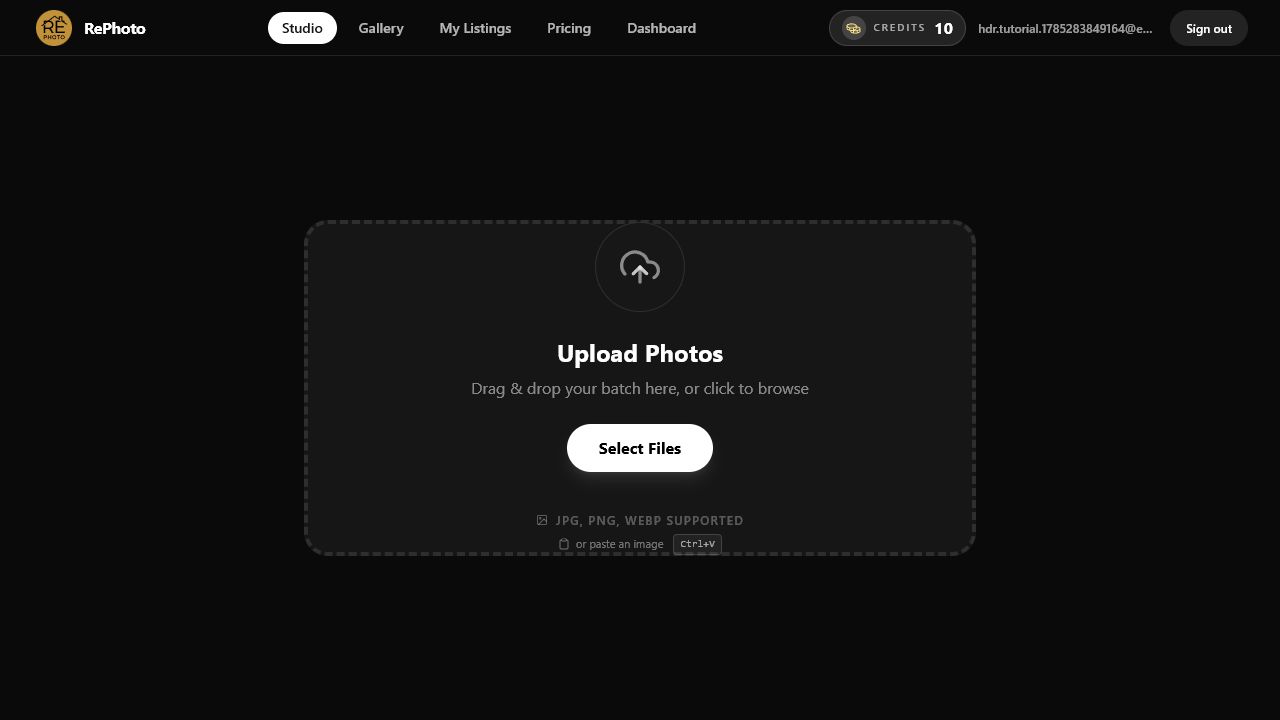
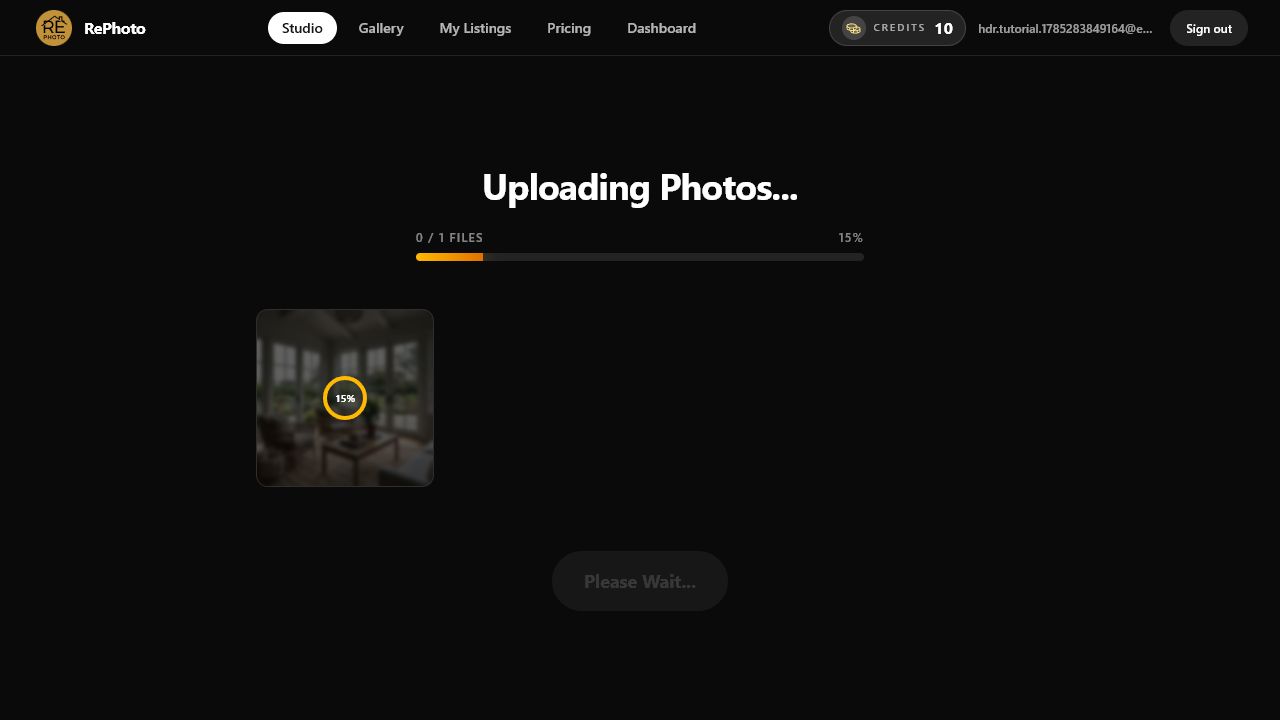
Select the interior image and wait for the upload to finish. RePhoto saves the original inside the listing session before it analyzes the scene. Keep the page open until the file reaches 100% and the editor begins preparing image-specific suggestions.
Step 3: Choose Brighten Interior Lighting
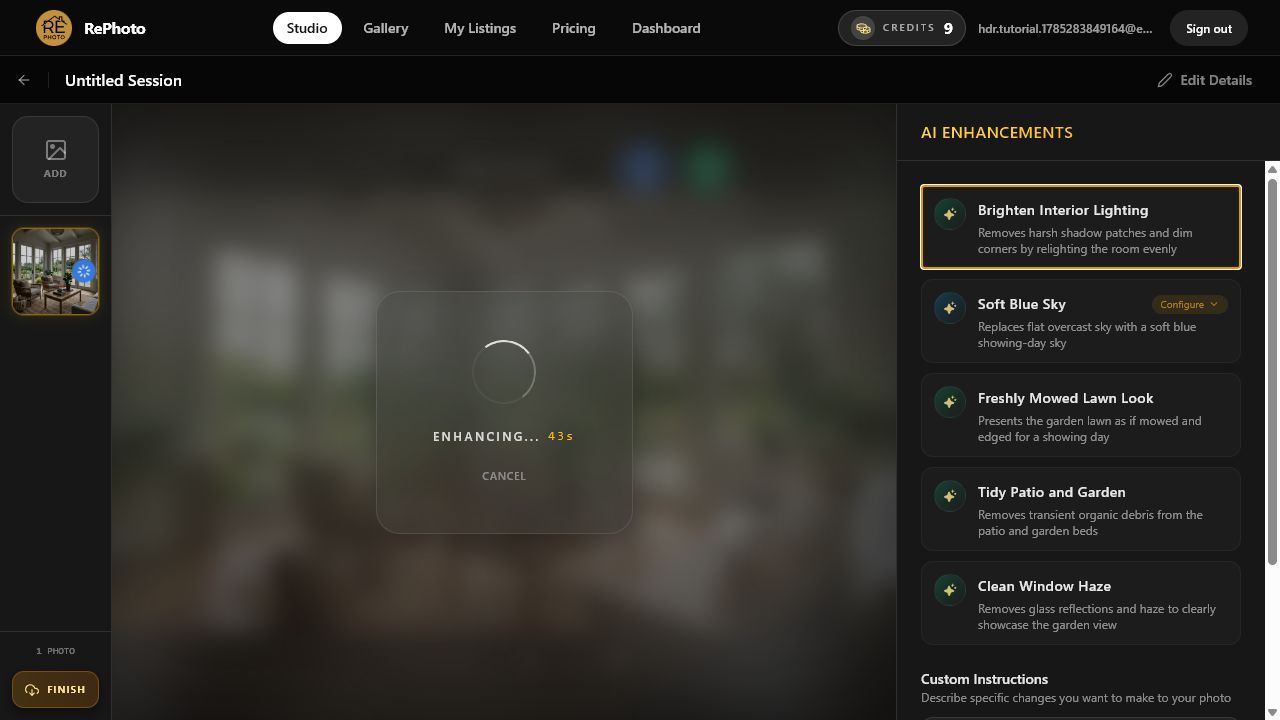
Wait for AI Enhancements to inspect the actual photo. In this run, RePhoto returned Brighten Interior Lightingwith the description “Removes harsh shadow patches and dim corners by relighting the room evenly.” That suggestion directly matched the problem, so no custom prompt or unrelated edit was needed.
Suggestion names are generated from each image and may vary. Look for the focused option that addresses exposure, dark corners, or uneven interior light. Do not combine a lighting fix with sky, landscaping, decluttering, or renovation unless those separate changes are genuinely required.
Step 4: Generate the lighting correction
Select Brighten Interior Lighting once and keep the editor open while the image is processed. The development balance moved from 10 credits to 9 for the successful enhancement. Processing time can vary with image size and model demand, so wait for Review Generation instead of submitting the same edit again.
Step 5: Review shadows, windows, and color
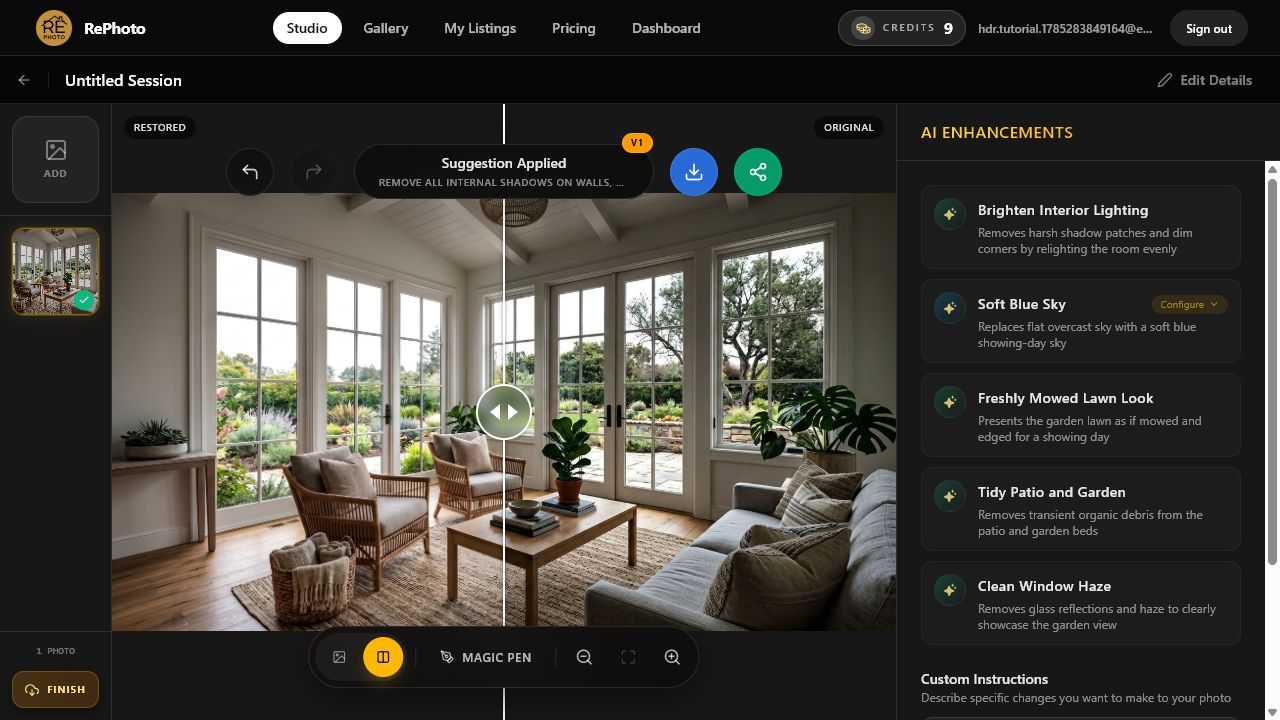
The result opens in Review Generation before it becomes final. In this image, the ceiling, wood floor, chairs, table, and sofa are easier to read, while the garden and window grid remain visible. The room is brighter without the flat gray appearance caused by lifting every tone equally.
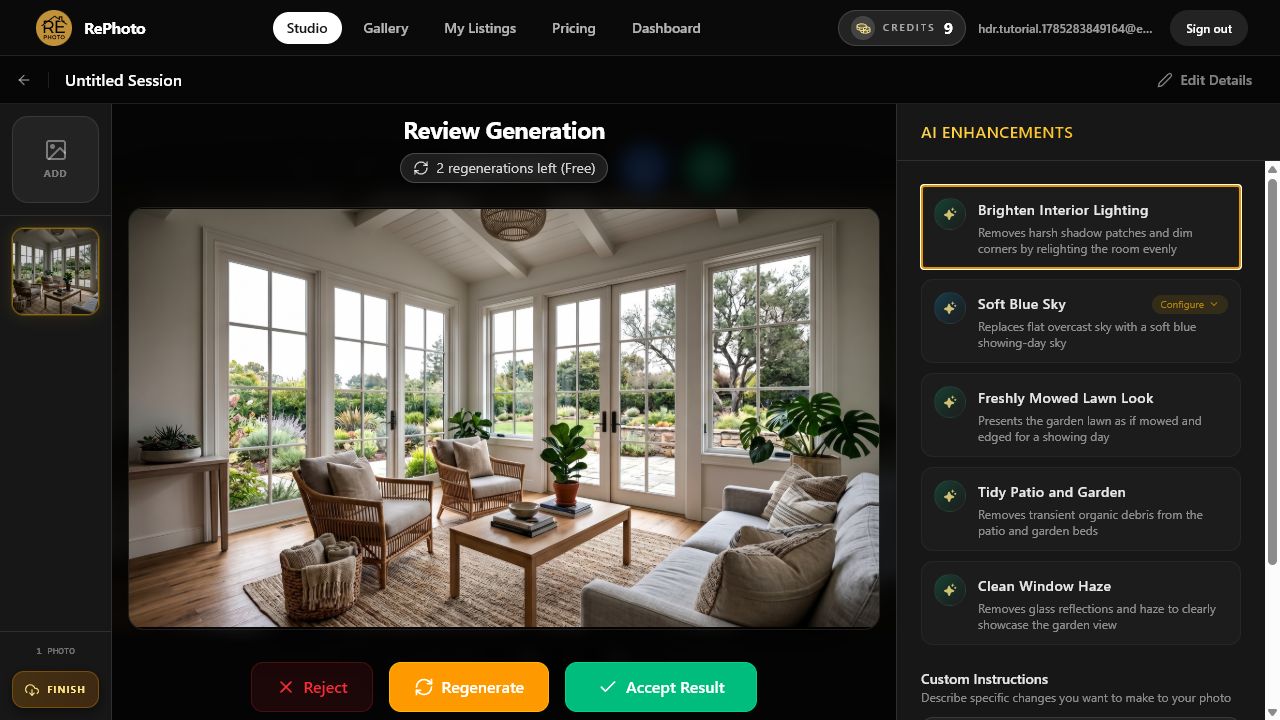
- Dark furniture and flooring retain texture instead of turning gray.
- Window views remain visible and are not replaced or blown white.
- Walls and ceiling stay neutral without a strong blue or orange cast.
- Window frames, doors, beams, furniture, and plants remain intact.
- No halos appear around windows or high-contrast edges.
- The room still has believable depth, highlights, and soft shadows.
Choose Regenerate if the room becomes washed out, the exterior turns unnaturally dark, highlights clip, color shifts heavily, or the model changes furniture or architecture. A useful exposure fix should improve visibility without redesigning the property.
Step 6: Accept, compare, and download
Select Accept Result after the correction passes review. Drag the comparison slider across the frame and inspect the brightened and original sides at the same scale. Check every edge one final time, then download the accepted version. The final balance remains at 9 credits.
Dark real estate photo quality checklist
- Begin with the best original file and avoid repeated compression.
- Lift shadows while preserving contrast and surface texture.
- Keep window detail when the source exposure contains it.
- Check white balance across walls, ceiling, flooring, and furniture.
- Reject warped lines, halos, invented objects, or changed views.
- Compare the entire frame before downloading the final image.
Accuracy and disclosure for lighting corrections
Exposure, white balance, and color correction are ordinary parts of real estate photography, but every listing still needs to represent the property accurately. Verify the current MLS rules and laws that apply to the listing. The CRMLS digitally altered image guidance distinguishes photographic corrections from edits that add, remove, or change scene elements.
Brighten what the camera recorded. Do not use a lighting correction to hide damage, replace a window view, invent a fixture, or misrepresent the condition of the property.
Frequently asked questions
How can I brighten a dark real estate photo?
Upload the highest-quality original, apply a focused interior-lighting or exposure enhancement, and review shadows, highlights, windows, color, and architecture before accepting. Avoid applying a global brightness boost that makes the entire room flat or clips the windows.
Is a single-photo AI enhancement the same as HDR?
No. True HDR photography usually merges several bracketed exposures. A single-photo AI enhancement creates an HDR-style balance from one frame. It is faster and useful after the shoot, but it cannot recover highlight or shadow detail that the original file never captured.
Can AI recover blown-out windows?
AI can balance a bright window when the source still contains useful detail. A completely clipped white area contains no genuine exterior information to recover, so any invented view would be inaccurate. Use exposure bracketing or a reshoot for extreme cases.
Can I brighten real estate photos taken on a phone?
Yes. Use the original full-resolution phone image, disable heavy filters, keep the lens clean, hold the camera level, and avoid digital zoom. A well-exposed phone file gives the enhancement more real detail to protect.
How many RePhoto credits does the lighting fix use?
The successful Brighten Interior Lighting enhancement in this tutorial used one credit, moving the development account from 10 credits to 9.
Brighten one real estate interior in RePhoto
Open RePhoto Studio and test one dark room, or learn more about AI listing photo enhancement for dark interiors. For a complete shoot-to-upload workflow, use our real estate listing photo checklist.