
How to Remove Clutter From a Real Estate Photo With AI (6 Steps)
Learn how to remove clutter from a real estate photo with AI in six steps, using a real bedroom workflow from upload and suggestions to review and download.

In this tutorial10 sections
Clutter can hide usable floor area, distract from a room's layout, and make an otherwise strong listing photo feel unprepared. This tutorial shows how to remove clutter from a real estate photo with AI using a real RePhoto run, from the original bedroom upload to the accepted before-and-after comparison.
Quick answer: upload the original listing photo, wait for image-specific suggestions, choose the decluttering task that matches the temporary items you want removed, generate, and verify that every permanent feature is unchanged. In this example, one accepted enhancement used one RePhoto credit.
What should AI remove from a listing photo?
Treat AI decluttering like a digital version of preparing the room before a shoot. Good targets are movable, temporary belongings: bags, loose clothing, toys, boxes, cords, toiletries, trash bins, or stacks of books. The goal is to reveal the real room, not to improve it by inventing a different property.
Usually safe to target
Personal belongings and movable clutter that could have been taken out of the room before the photographer arrived.
Do not hide or change
Damage, stains, permanent fixtures, walls, windows, doors, flooring, built-ins, views, or any feature that affects the property itself.
Step 1: Choose and upload the original photo
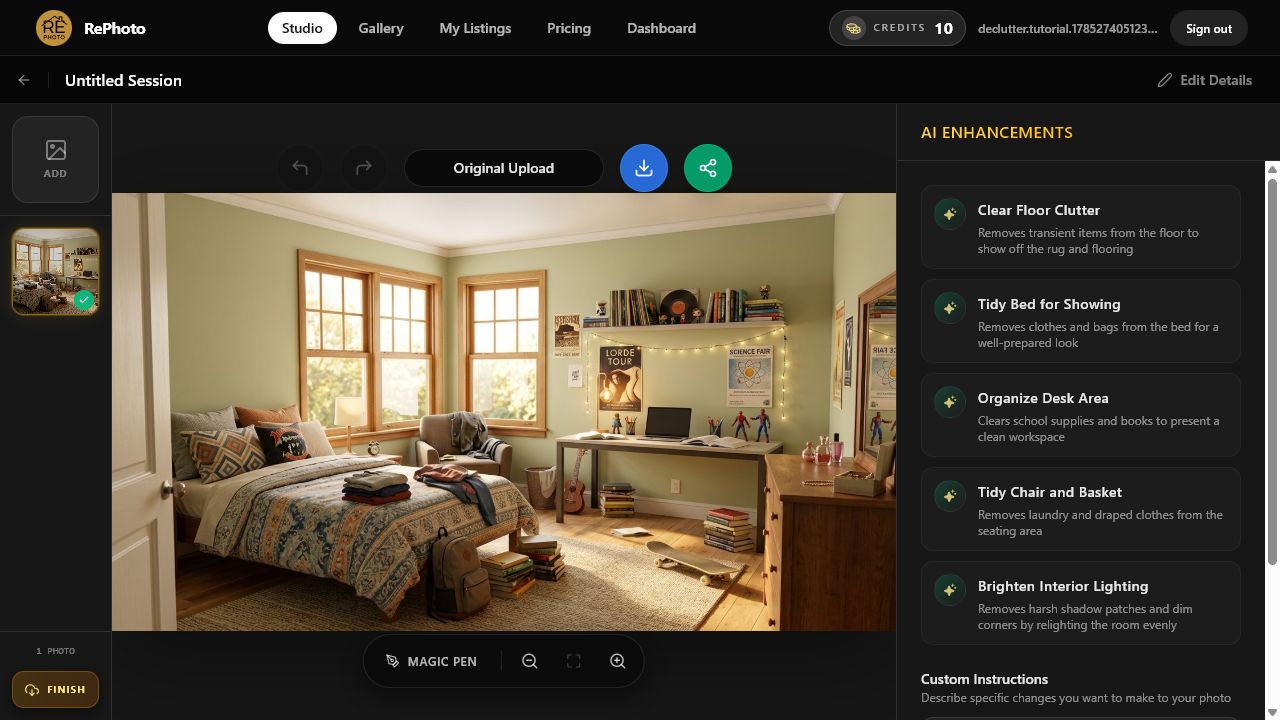
Open RePhoto Studio and select the highest-resolution original available. For this test, we used a bedroom photo with a backpack, a skateboard, books, and other visible belongings. The walls, windows, floor, rug, bed, desk, and dresser were all clear enough to use as reference points when checking the result.
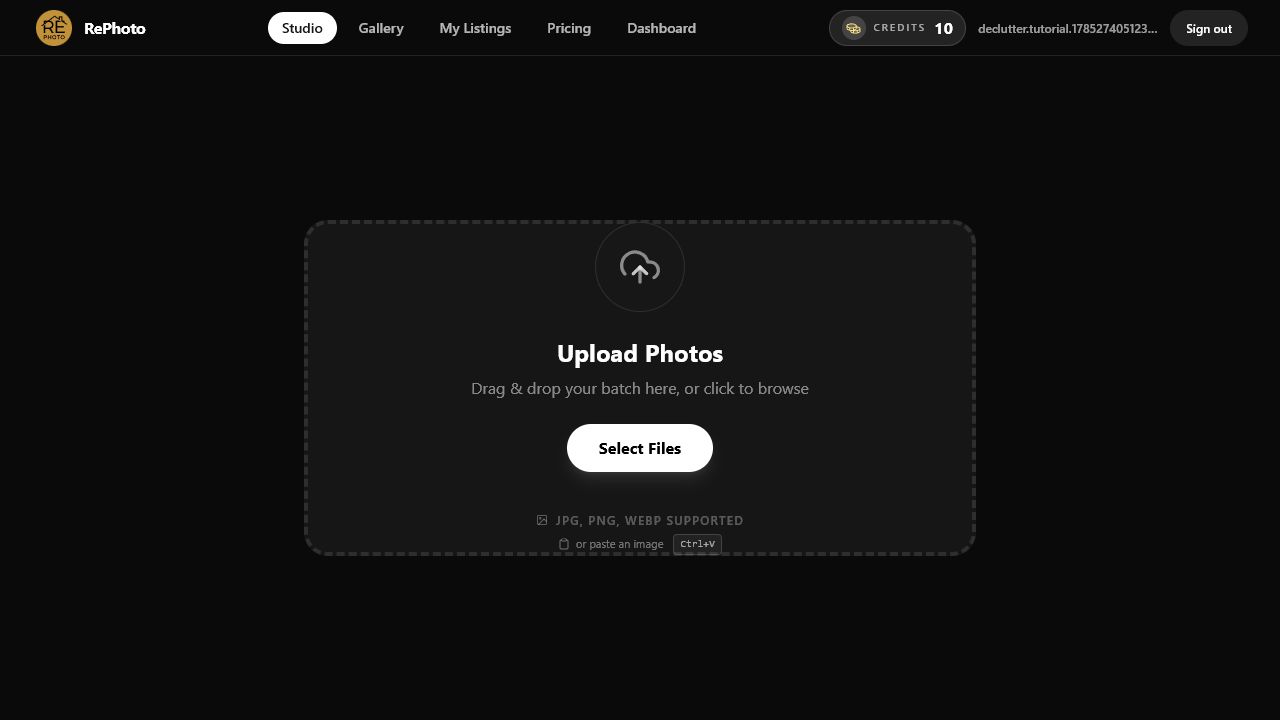
A level, well-exposed source gives the model the best chance of rebuilding the floor and rug behind removed objects. Avoid screenshots, heavily compressed portal images, or files that have already been edited several times.
Step 2: Wait for AI Enhancements to analyze the room
After the upload finishes, RePhoto inspects the photo and creates suggestions for the actual scene. In this run, the panel identified separate opportunities for the floor, bed, desk, chair, and lighting. That separation matters: a focused edit is easier to review than a broad instruction that changes many areas at once.
Step 3: Choose Clear Floor Clutter
Select Clear Floor Clutter. RePhoto translated that suggestion into a precise instruction: remove the skateboard, backpack, and stacks of books from the floor and rug while preserving the rug, flooring, walls, furniture, exposure, lighting, and wall color.
The wording of suggestions can vary because it reflects what the model finds in each image. Choose the narrowest suggestion that covers the distracting objects you actually want gone. If the exact task does not appear, use Custom Instructions and name both the objects to remove and the permanent features to preserve.
Step 4: Generate the decluttered photo
Start the enhancement and keep the editor open while RePhoto reconstructs the hidden floor and surrounding textures. The account balance in this real run moved from 10 credits to 9 for the enhancement.
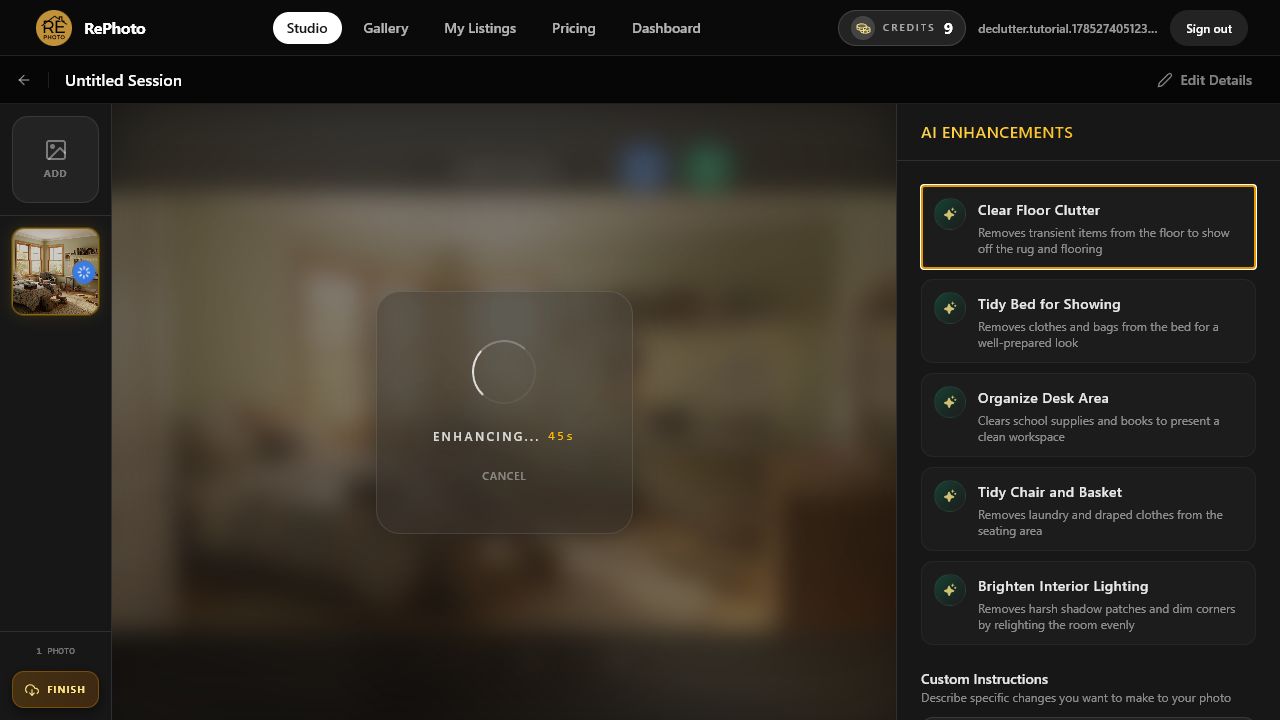
Processing time varies with image size and model demand. Do not refresh or submit the same task again just because the estimate changes; wait for the review screen.
Step 5: Review every removed object and rebuilt surface
The new image opens in Review Generation. Inspect it at full size before accepting. In this example, the skateboard, backpack, and floor-level book stacks were removed. The clothing on the bed remained because this first task deliberately targeted only floor clutter.
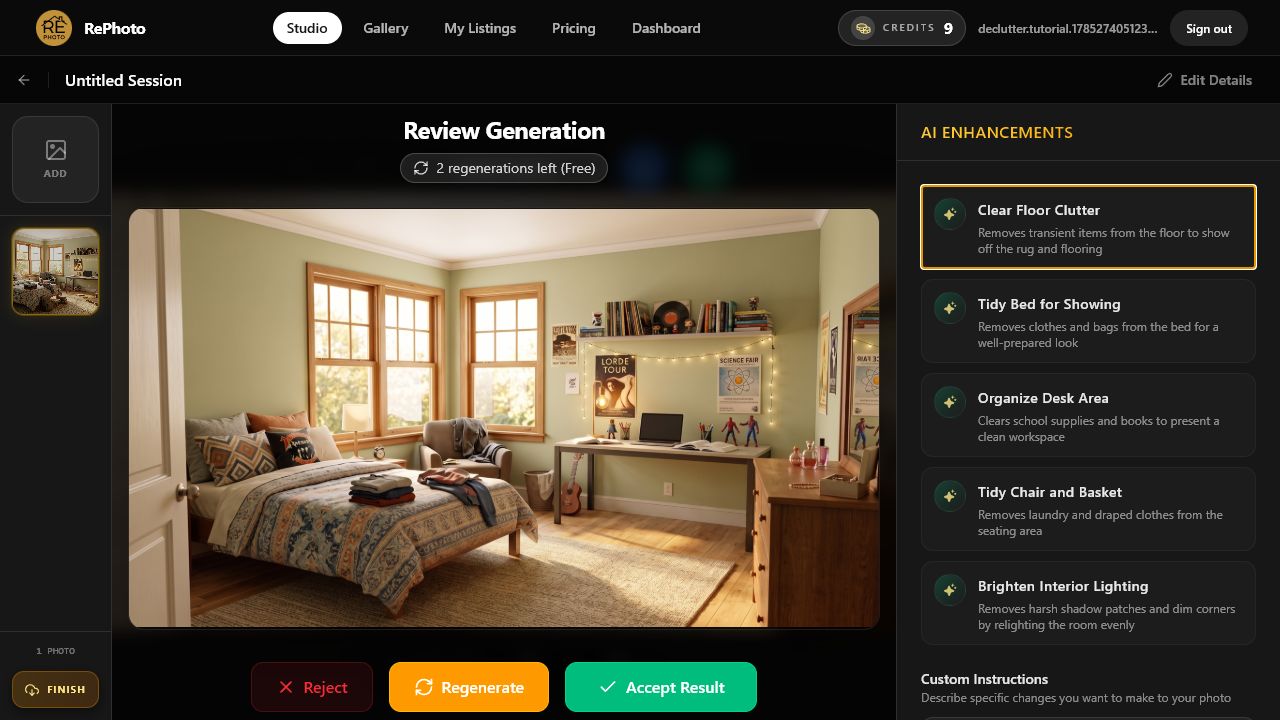
- The removed objects leave no shadows, fragments, or repeated textures.
- Rug edges and floorboards continue naturally through the edited areas.
- Furniture legs and nearby object boundaries are complete and believable.
- Walls, windows, trim, outlets, built-ins, and room dimensions are unchanged.
- Lighting, exposure, white balance, and reflections still match the original.
- No defect or permanent part of the property has been hidden.
Choose Regenerate if the floor pattern bends, an object fragment remains, or the room's real features change. A clean removal is useful only when the resulting listing photo stays accurate.
Step 6: Accept, compare, and download
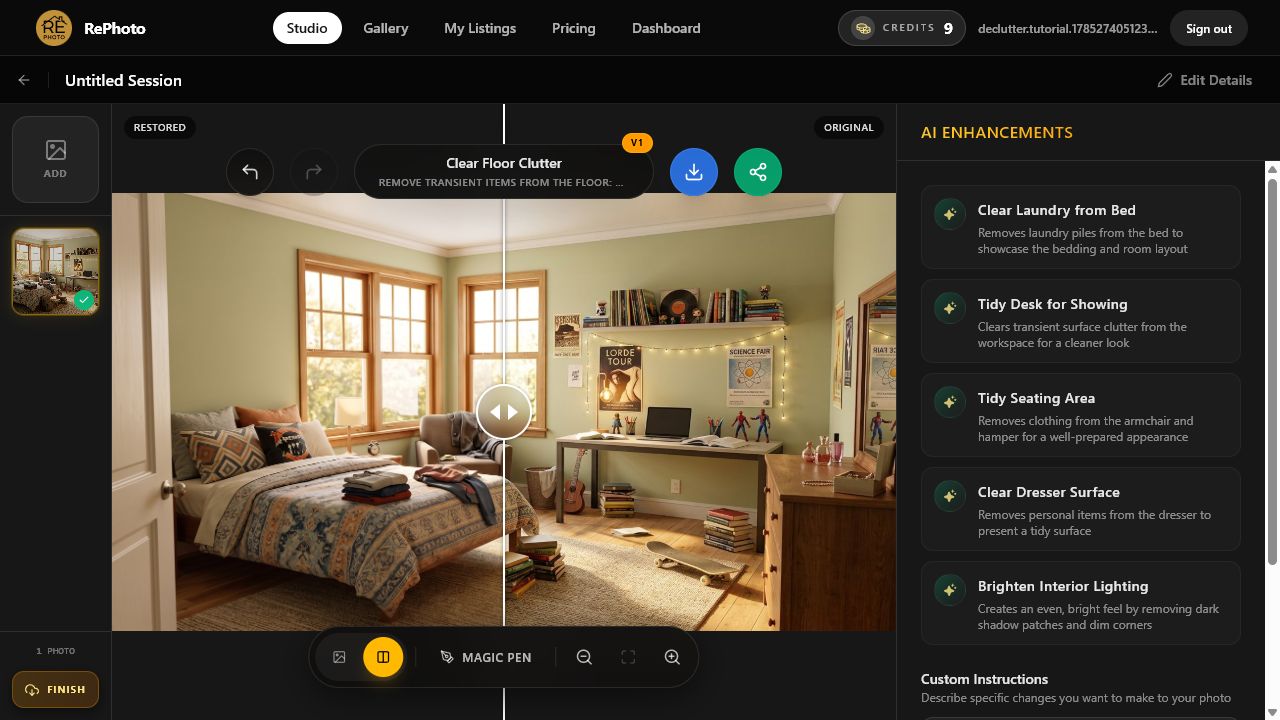
Select Accept Result after the image passes inspection. Use the comparison slider to move between the restored and original versions. This final pass makes subtle changes easier to spot and confirms that the accepted balance remains at 9 credits.
If another area still needs attention, apply a second focused enhancement only after saving and reviewing the first one. For example, the next task for this bedroom could be Clear Laundry from Bed. Keeping each edit focused makes it easier to identify which generation introduced a problem.
Real estate photo decluttering checklist
- Remove only personal property and temporary clutter.
- Use one clearly defined area or object group per enhancement.
- Name the architectural and permanent elements that must be preserved.
- Compare floor patterns, shadows, reflections, and object boundaries.
- Keep the unedited original and the accepted result together.
- Reject any version that changes the condition or features of the property.
Disclosure and MLS accuracy for AI-decluttered photos
MLS policies and local laws vary, so verify the requirements that apply to the listing. Current guidance from NorthstarMLS limits AI staging edits to personal property and recommends disclosure plus an unaltered before image. The CRMLS digitally altered image guidance likewise distinguishes common photographic corrections from edits that add, remove, or change elements, and requires originals and disclosure in the situations covered by its rules.
Decluttering should show the same property with temporary belongings removed. It should never conceal a defect or alter a permanent feature.
Frequently asked questions
Can AI remove clutter from a real estate photo?
Yes. AI can remove movable objects and reconstruct the visible floor, wall, or furniture surface behind them. Results are strongest when the source is sharp and the edit targets a specific group of objects.
What clutter should I remove from listing photos?
Prioritize personal and temporary items that distract from the room: laundry, toys, boxes, bins, toiletries, loose cords, bags, and excess countertop items. Do not remove defects or real property features.
Can I remove furniture from a listing photo?
Movable furniture can be a valid digital-removal target, but it is a more extensive alteration than clearing small belongings. Check applicable disclosure rules, retain the original, and inspect the reconstructed wall and floor carefully. If the goal is a fully redesigned room, consider a separate virtual staging workflow.
Should I declutter before the real estate photo shoot?
Yes whenever possible. Physical preparation produces the most accurate image and reduces editing. AI decluttering is most useful for overlooked objects, occupied properties, tight schedules, or photos that cannot be reshot.
Should the original photo stay in the listing?
Keep the original regardless. Whether it must also appear beside the edited image depends on the MLS and jurisdiction, but pairing the before and after is a strong transparency practice and is required in some markets.
Try AI decluttering on one listing photo
Open RePhoto Studio and test one room with a clearly defined clutter problem, or learn more about the AI real estate photo decluttering tool. If removing the belongings leaves a genuinely empty room, continue with our step-by-step virtual staging tutorial.