
How to Replace an Overcast Sky in a Real Estate Photo (7 Steps)
Learn how to replace an overcast sky in a real estate photo with AI in seven steps, using a real Soft Blue Sky workflow from upload to final review.

In this tutorial11 sections
A flat gray sky can make a carefully photographed exterior feel dull even when the property and landscaping look excellent. This tutorial shows how to replace an overcast sky in a real estate photo with AI using a complete RePhoto run, from the original upload to the accepted before-and-after comparison.
Quick answer: upload the original exterior, wait for image-specific AI suggestions, choose Soft Blue Sky, keep the sky type natural for the existing daylight, generate, and inspect every roofline and tree edge before accepting. This real enhancement used one RePhoto credit.
Sky replacement versus day-to-dusk
A daytime sky replacement keeps the photo in the same general time of day. It swaps a dull, blown-out, or overcast sky for a believable daylight sky while preserving the property's real architecture and surroundings. Day-to-dusk is a separate transformation that changes the entire scene to twilight and may add warm window light.
Use sky replacement when the exterior is already a strong daytime photo and only the weather looks unhelpful. Use the day-to-dusk workflow when the marketing goal is an evening hero image.
Step 1: Choose a suitable overcast exterior
Start with the highest-resolution original available. A good candidate has a clearly visible sky boundary, a level camera, and an exterior that is correctly exposed. This example shows a manor beneath a uniform gray sky, with roof peaks, chimneys, and trees that make edge accuracy easy to evaluate.
- Keep the full roofline and enough sky for a natural composition.
- Avoid files with blown-out halos around trees or architecture.
- Use a level frame so vertical walls remain straight.
- Do not begin with a heavily filtered or repeatedly compressed image.
- Retain the original file for comparison and disclosure.
Step 2: Upload the overcast real estate photo
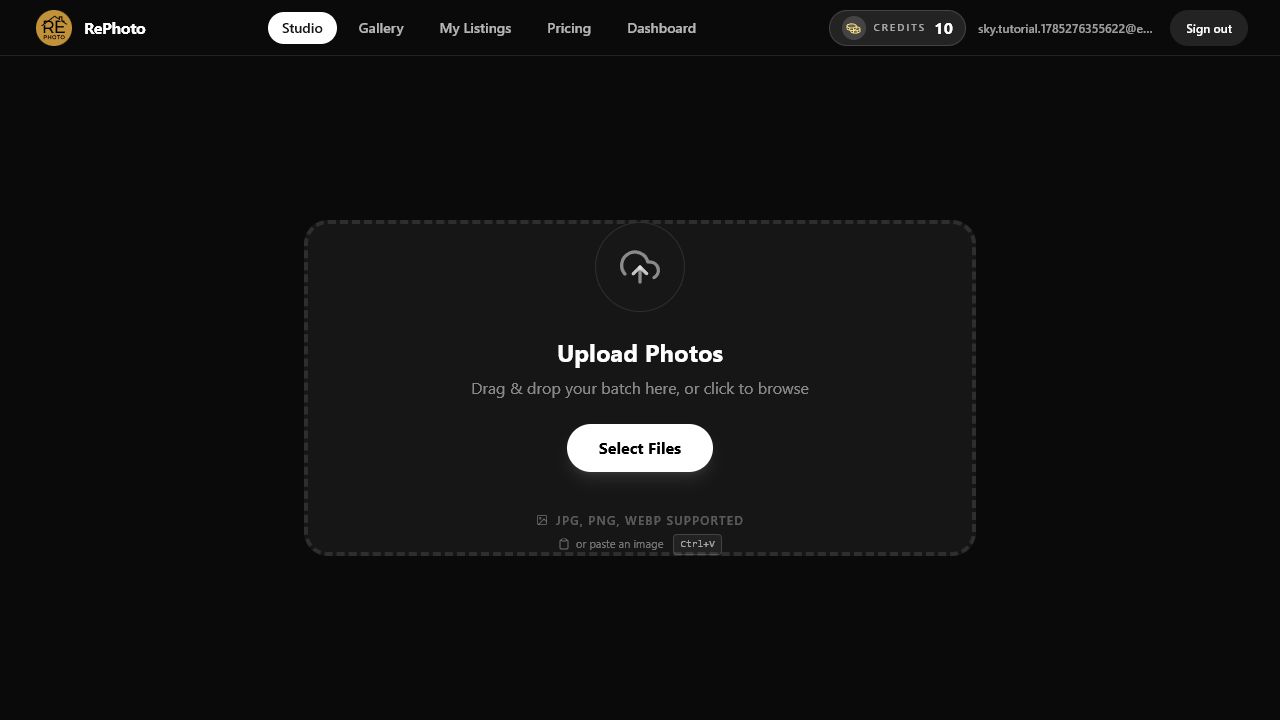
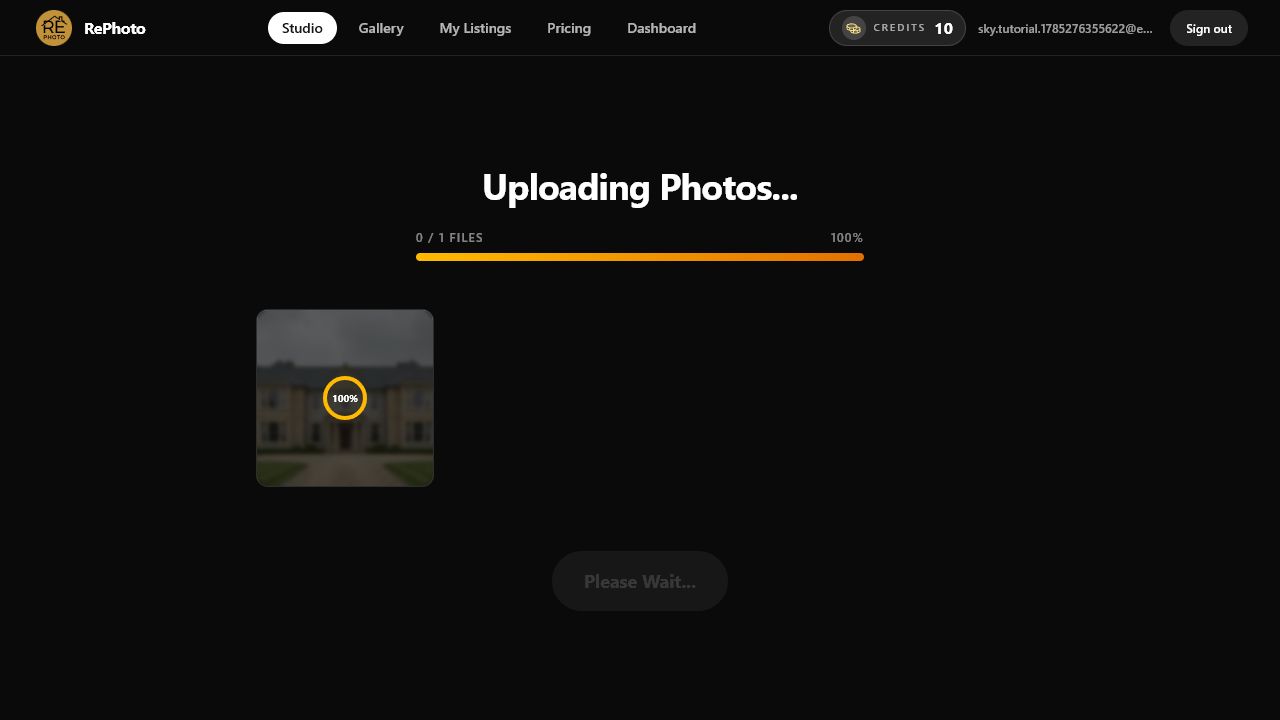
Select the exterior photo and wait for the upload to finish. RePhoto saves the original, opens the editor, and analyzes the actual scene before it suggests an enhancement. Keep the page open until the image appears in the editor.
Step 3: Choose Soft Blue Sky
Wait for AI Enhancements to finish analyzing the photo. For this exterior, RePhoto returned Soft Blue Sky with the description “Replaces the flat overcast sky with a soft blue showing-day sky.” It also offered a separate twilight option, which we deliberately did not use.
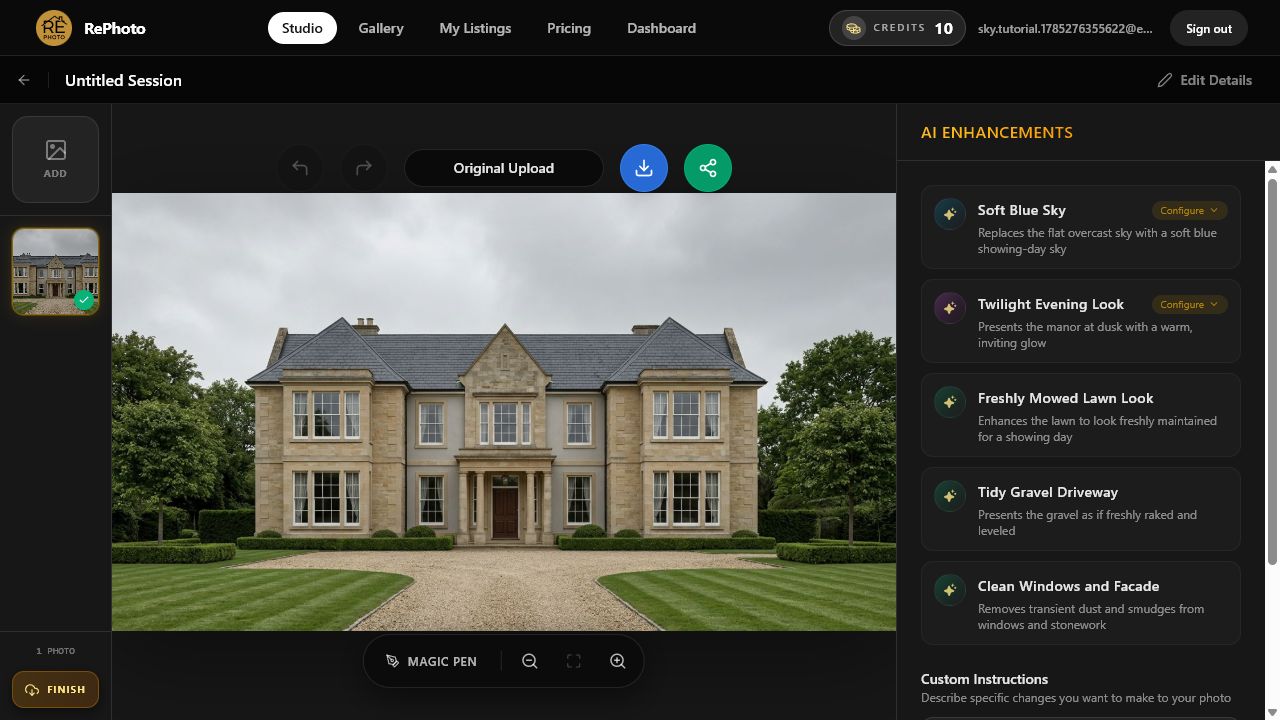
Suggestions are generated from each image, so the exact wording may vary. Choose a sky that is plausible for the season, landscape, and lighting in the original. A dramatic sunset above a flat midday foreground will look composited even when the masking is technically clean.
Step 4: Keep Sky Type set to Soft Blue
Open the suggestion and confirm that Sky Type is Soft Blue. This is a useful default for listing photos because it adds restrained color and light clouds without overpowering the house. Then select Generate with settings.
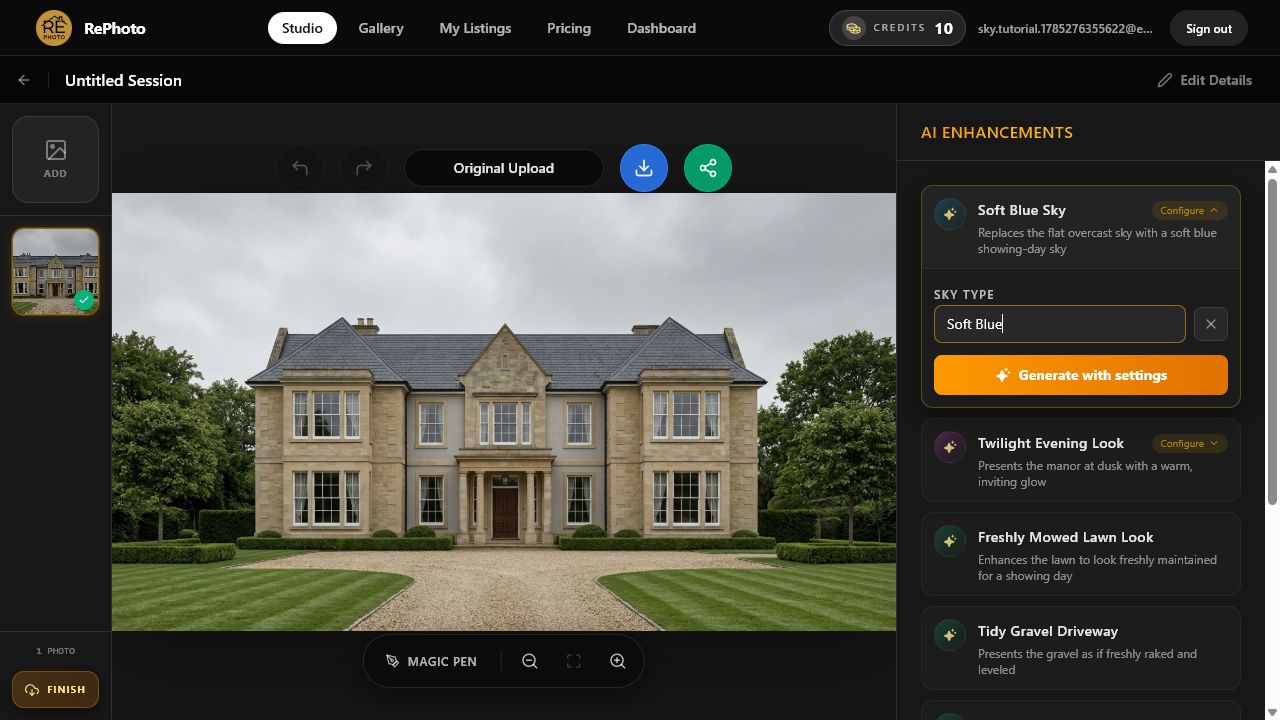
If the property was photographed in very warm, cold, or directional light, choose a replacement that matches those conditions. Adobe's sky replacement tutorial makes the same practical point: a visually dramatic sky is not necessarily plausible for the light in the source scene.
Step 5: Generate the new daylight sky
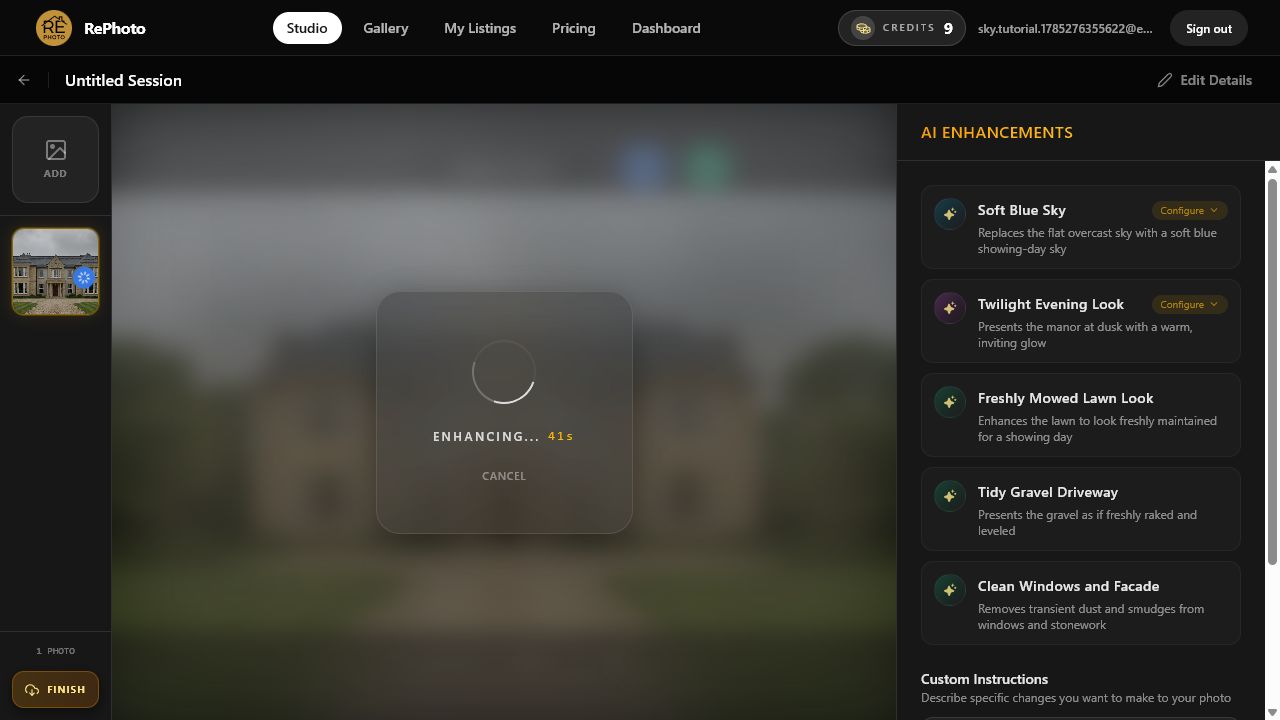
RePhoto replaces the sky and adjusts the overall image lighting to match the selected sky type. The test account moved from 10 credits to 9 when generation began. Processing time varies with image size and model demand, so wait for the review screen instead of submitting the task again.
Step 6: Review rooflines, trees, and lighting
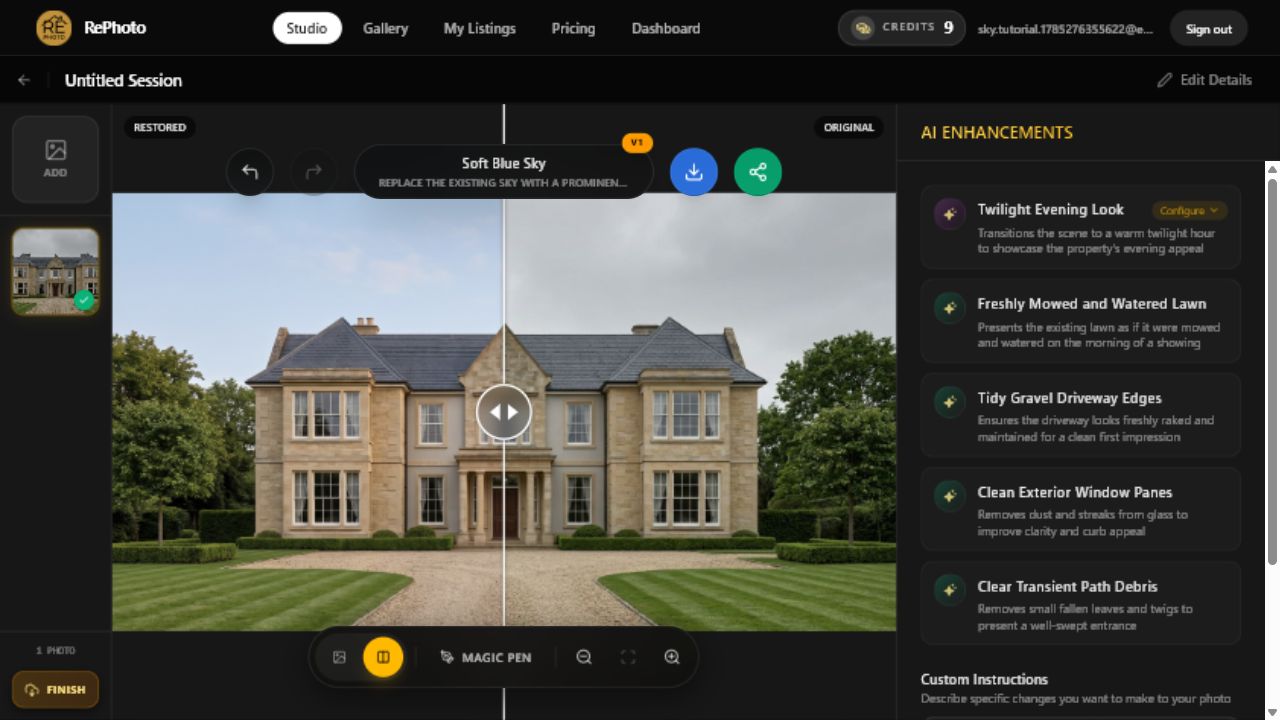
The generated image opens in Review Generation. In this result, the flat gray sky became a pale blue sky with soft clouds. The house, roof, chimneys, windows, driveway, lawn, and surrounding trees remained recognizable and consistent with the original.
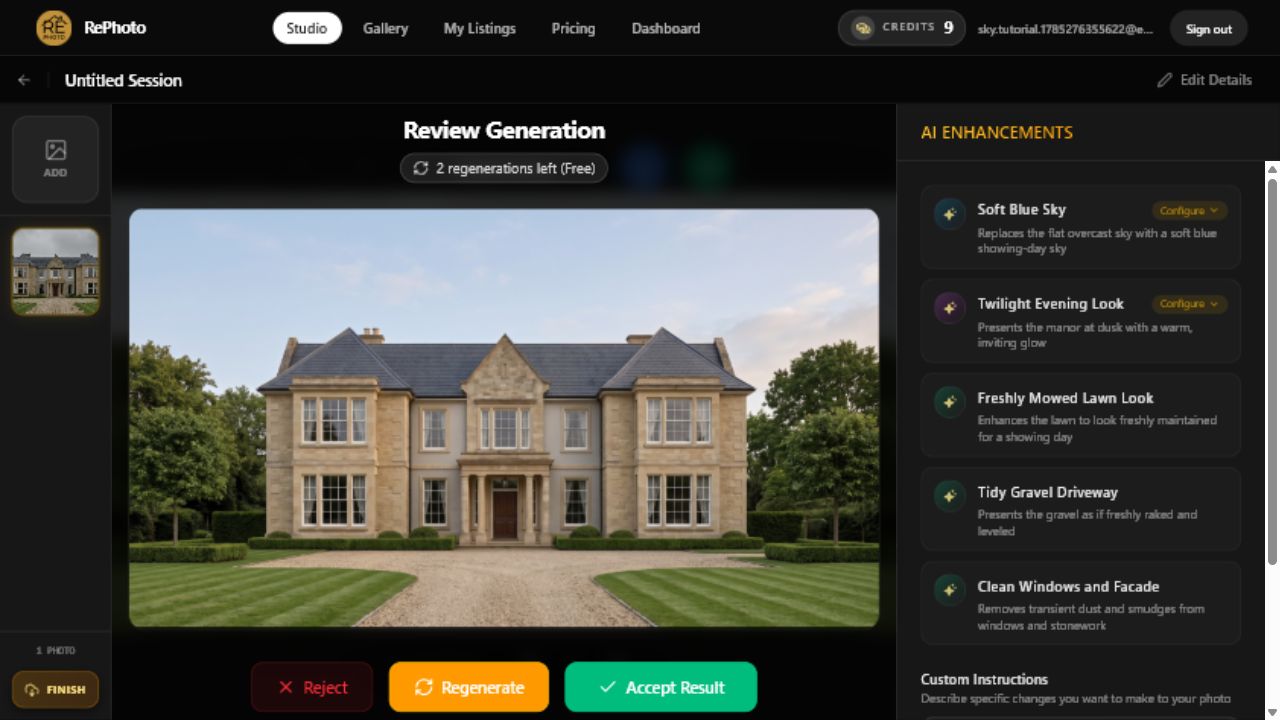
- Roof peaks, chimneys, antennas, and tree branches have clean edges.
- No blue halos or gray cutouts remain along the horizon.
- Cloud scale and perspective look natural for the lens and composition.
- The sky brightness agrees with the facade, lawn, and existing shadows.
- Windows and reflective surfaces do not show contradictory weather.
- Architecture, landscaping, driveway, views, and property condition are unchanged.
Use Regenerate if the sky leaks onto the roof, fine tree branches disappear, or the foreground lighting becomes implausible. Clean masking is necessary, but lighting continuity is what makes the final photo believable.
Step 7: Accept, compare, and download
Select Accept Result when the image passes inspection. Drag the comparison slider across the exterior to confirm that the sky and compatible scene lighting are the only meaningful changes. The accepted balance remains at 9 credits.
Natural sky replacement checklist
- Choose a daylight sky that matches the source time and season.
- Prefer restrained cloud contrast for a standard listing exterior.
- Inspect every roof peak, chimney, branch, cable, and horizon edge.
- Match brightness, color temperature, and shadow direction.
- Keep permanent features, landscaping, and views unchanged.
- Save the original beside the accepted version.
Disclosure and accuracy for edited listing skies
Sky replacement changes an element of the photograph, so check the MLS rules and laws that apply to the listing. Current CRMLS guidance on digitally altered images distinguishes ordinary photographic corrections from edits that add, remove, or change scene elements. Keep the unaltered source and disclose the edit wherever the applicable policy requires it.
A replacement sky should improve presentation without implying a false view, hiding a defect, or changing the property and its surroundings.
Frequently asked questions
Can AI replace an overcast sky in a real estate photo?
Yes. AI can detect the sky boundary, generate a new daylight sky, blend complex edges, and harmonize the foreground. The result still needs a full-resolution review around roofs, chimneys, and trees.
What is the best sky for real estate photos?
A soft blue sky with restrained, believable clouds is a dependable choice for daytime listings. The best replacement matches the original light, season, weather cues, and property location instead of looking dramatic for its own sake.
Does sky replacement change the house?
It should not. Reject any generation that changes the roof, facade, windows, driveway, landscaping, lot boundaries, view, or visible property condition. Only the sky and subtle lighting needed for a credible blend should change.
Is sky replacement the same as a twilight conversion?
No. Sky replacement can keep the image in daylight, while a twilight conversion changes the scene to dusk and often introduces warm exterior or window lighting. They serve different search and marketing goals.
Should I disclose a replaced sky?
Requirements differ by MLS and jurisdiction. Keep the original in all cases, verify the current rule for the listing, and label or pair the edited image with the original when required.
Replace one overcast sky in RePhoto
Open RePhoto Studio and test one strong daytime exterior, or learn more about the AI sky replacement tool for real estate. For an evening presentation instead, follow the day-to-dusk real estate photo tutorial.